
“`html
Nothing says cozy fall vibes quite like these delightful Pumpkin Pie Pop Tarts. This Pumpkin Pie Pop Tarts Recipe takes the beloved flavors of pumpkin pie and wraps them into handheld, flaky treats that are perfect for breakfast, snack time, or even dessert. Imagine biting into a warm, golden tart filled with a sweet and spiced pumpkin center—it’s like autumn wrapped up in a little pastry. If you’ve ever craved the classic tastes of pumpkin pie but wanted something more fun and portable, this recipe is your new best friend.
Ingredients You’ll Need
It’s amazing how just a few simple ingredients come together to create such a charming and flavorful treat. Each component plays a crucial role, from the rich pumpkin puree to the tender pie crust, crafting the perfect balance of creamy filling and flaky exterior.
- 1/2 cup unsweetened pumpkin puree: Provides that authentic pumpkin flavor and creamy texture essential for the filling.
- 2 tablespoons packed brown sugar: Adds warmth and sweetness, enhancing the pumpkin’s natural earthiness.
- 1/4 teaspoon pumpkin pie spice: A blend of cinnamon, nutmeg, clove, and ginger that evokes the iconic pumpkin pie aroma.
- Flour (for rolling out the dough): Keeps the pie crust from sticking and helps achieve a smooth, even surface for cutting shapes.
- 1 pie crust (purchased or homemade): The golden, flaky foundation that holds all the delicious filling inside. Homemade crust will add extra love!
How to Make Pumpkin Pie Pop Tarts Recipe
Step 1: Preheat and Prep Your Baking Surface
Start by heating your oven to 400 degrees Fahrenheit—getting the oven to the right temperature early helps the crust bake evenly. Lay parchment paper or a silpat mat on your baking sheet to prevent sticking and ensure a clean, crisp bottom to your pop tarts.
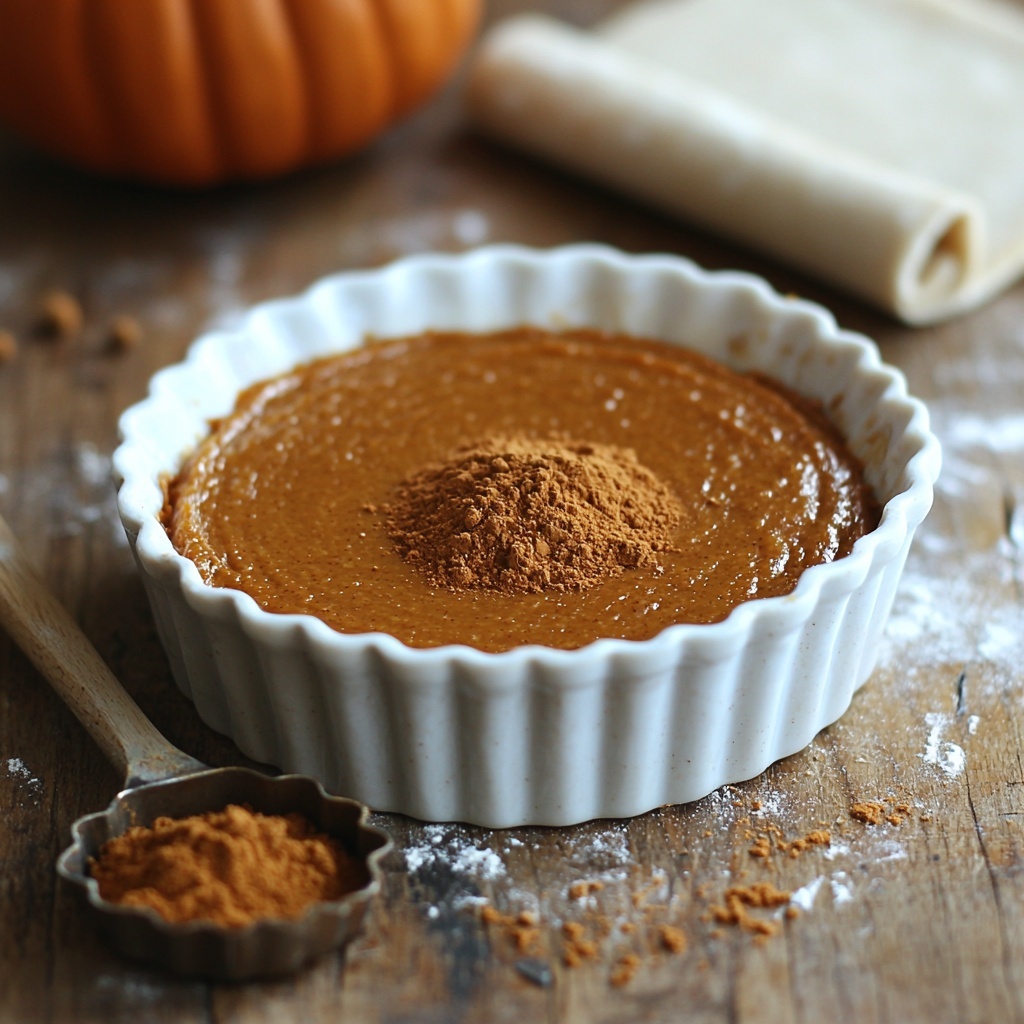
Step 2: Mix Your Pumpkin Pie Filling
In a small bowl, gently combine the pumpkin puree, brown sugar, and pumpkin pie spice. This simple mixture is what transforms these tarts into little bites of fall heaven. Mixing it well ensures each bite is perfectly balanced with sweetness and spice.
Step 3: Roll, Cut, and Decorate the Crust
Lightly dust your work surface with flour, then roll out your pie crust to about 1/4 inch thick for that ideal texture—thick enough to hold the filling but thin enough to stay flaky and light. Using a pumpkin-shaped cookie cutter, cut out roughly 20 shapes. If pumpkins aren’t handy, rectangular shapes work wonderfully too. For added charm, use a small paring knife to carve fun pumpkin faces or accents on half of the cutouts—it’s like giving your tarts a little personality.
Step 4: Fill and Seal Your Tarts
Place one uncut pumpkin shape on the floured surface, then spoon about a heaping teaspoon of your pumpkin filling onto the center, spreading it almost to the edges. Lightly wet the edges with water by dipping your finger and run it around the perimeter—this helps seal the two dough layers. Press a cut-out pumpkin shape on top and gently crimp the edges to secure the filling inside. Repeat until all your dough and filling are used.
Step 5: Bake to Golden Perfection
Arrange the prepared tarts on your baking sheet and pop them into the oven for about 18 minutes. You’ll know they’re done when the crust turns golden brown and aromatic scents fill your kitchen. Once out of the oven, set them aside briefly to cool—they’re best enjoyed when still a little warm!
How to Serve Pumpkin Pie Pop Tarts Recipe
Garnishes
To elevate these Pumpkin Pie Pop Tarts even further, consider dusting them lightly with powdered sugar or drizzling a simple glaze made with powdered sugar and maple syrup. For an extra touch, a dollop of whipped cream or a sprinkle of cinnamon on top adds a lovely finishing touch that audiences will adore.
Side Dishes
Pair these pop tarts with a warm cup of coffee, chai tea, or even hot apple cider for a quintessential fall combo. If serving at brunch, a fresh fruit salad or steamed greens provide a light counterbalance to the pastry’s richness.
Creative Ways to Present
Serve on a rustic wooden board with a scattering of autumn leaves or pumpkin decor to set a festive ambiance. Or, stack them on a pretty plate to create a tempting tower that invites guests to dive in. You can also wrap them individually in parchment for gifting or parties—friendship and pumpkin flavors, all in one bite!
Make Ahead and Storage
Storing Leftovers
Once cooled completely, keep your Pumpkin Pie Pop Tarts in an airtight container at room temperature for up to two days. This keeps the crust crisp and the filling fresh, making them just as delicious the next morning.
Freezing
These pop tarts freeze beautifully! Place them in a single layer on a baking sheet to flash freeze, then transfer to a freezer-safe bag or container. They’ll keep well for up to a month, perfect for those times you want a quick seasonal treat on hand.
Reheating
To revive that fresh-baked warmth and flakiness, reheat frozen or refrigerated tarts in a 350-degree oven for 7-10 minutes. Avoid the microwave if you want to keep the crust crispy and avoid sogginess.
FAQs
Can I use homemade pumpkin puree for this Pumpkin Pie Pop Tarts Recipe?
Absolutely! Homemade pumpkin puree will add an extra layer of freshness and control over flavor. Just be sure to strain any excess liquid so your filling isn’t too wet.
Is it necessary to carve faces on the pumpkin shapes?
Not at all! The carved faces are a fun detail that make these extra festive, but the tarts will taste just as wonderful without them. Rectangular shapes or simple cutouts work great too.
Can I make these tarts vegan?
Yes, by using a vegan pie crust and substituting brown sugar with coconut sugar or another vegan-friendly sweetener, you can enjoy these Pumpkin Pie Pop Tarts while keeping it plant-based.
What if I don’t have pumpkin pie spice?
You can easily make your own blend using cinnamon, ginger, nutmeg, and cloves—or just use cinnamon alone for a simpler taste. The spice mix really brings out that classic pumpkin pie flavor.
Can I prepare these tarts ahead of time?
Definitely. You can assemble them and keep them refrigerated overnight, then bake fresh in the morning for the best texture and flavor. This makes them perfect for busy holiday mornings or brunch gatherings.
Final Thoughts
If you’re looking for an irresistible way to celebrate pumpkin season, this Pumpkin Pie Pop Tarts Recipe is an absolute must-try. They’re fun to make, delicious to eat, and bring that beloved pumpkin pie flavor into a handheld treat perfect for sharing. Trust me, once you try these, they’ll become a seasonal favorite that you’ll want to bake again and again.
“`
Print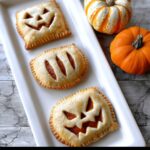
Pumpkin Pie Pop Tarts Recipe
- Prep Time: 30 minutes
- Cook Time: 18 minutes
- Total Time: 48 minutes
- Yield: 10 pop tarts
- Category: Breakfast, Snack, Dessert
- Method: Baking
- Cuisine: American
- Diet: Vegetarian
Description
These Pumpkin Pie Pop Tarts are a delightful autumn treat featuring a flaky pie crust filled with a spiced pumpkin puree blend. Perfect for a seasonal breakfast or snack, these pop tarts combine the comforting flavors of pumpkin pie in a portable, bite-sized form. Easy to prepare with store-bought or homemade pie crust, they bake to a golden crisp and are fun to customize with cute pumpkin-shaped designs.
Ingredients
Filling
- 1/2 cup unsweetened pumpkin puree
- 2 tablespoons packed brown sugar
- 1/4 teaspoon pumpkin pie spice
Dough
- Flour, for rolling out the dough
- 1 pie crust (purchased or homemade)
Instructions
- Preheat Oven: Preheat the oven to 400 degrees F (200 degrees C). Line a large baking sheet with parchment paper or a Silpat mat to prevent sticking.
- Prepare Filling: In a small bowl, combine the unsweetened pumpkin puree, packed brown sugar, and pumpkin pie spice until evenly mixed. This will be the flavorful filling for your tarts.
- Roll and Cut Dough: Lightly flour a clean surface and roll out your pie crust dough to a uniform 1/4-inch thickness. Use a pumpkin-shaped cookie cutter to cut out about 20 shapes from the dough. If desired, use a paring knife to carve pumpkin faces or wrinkle details into half of the pumpkin shapes for a festive look. Alternatively, rectangular shapes may be used.
- Assemble Tarts: Place a pumpkin-cut dough shape without cut-outs onto a floured surface. Spoon a heaping teaspoon of the pumpkin filling onto the center and spread it toward the edges, leaving a small border. Lightly moisten the edges of the dough with water using your finger. Carefully top with a cut-out pumpkin dough shape and gently press the edges to seal the filling inside. Repeat this until all tarts are assembled.
- Bake: Arrange the assembled pop tarts evenly spaced on the prepared baking sheet. Bake in the preheated oven for approximately 18 minutes or until the crust is golden brown and cooked through. Remove from the oven and allow the tarts to cool on a rack before serving.
Notes
- You can use store-bought pie crust to save time or make your own from scratch for a fresher taste.
- Feel free to customize the pumpkin pie spice by adding cinnamon, nutmeg, or cloves according to preference.
- Be sure to seal the edges well to prevent the filling from leaking out during baking.
- Allow the tarts to cool completely for best flavor and easier handling.
- These pop tarts can be stored in an airtight container at room temperature for 2 days or refrigerated for up to a week.
