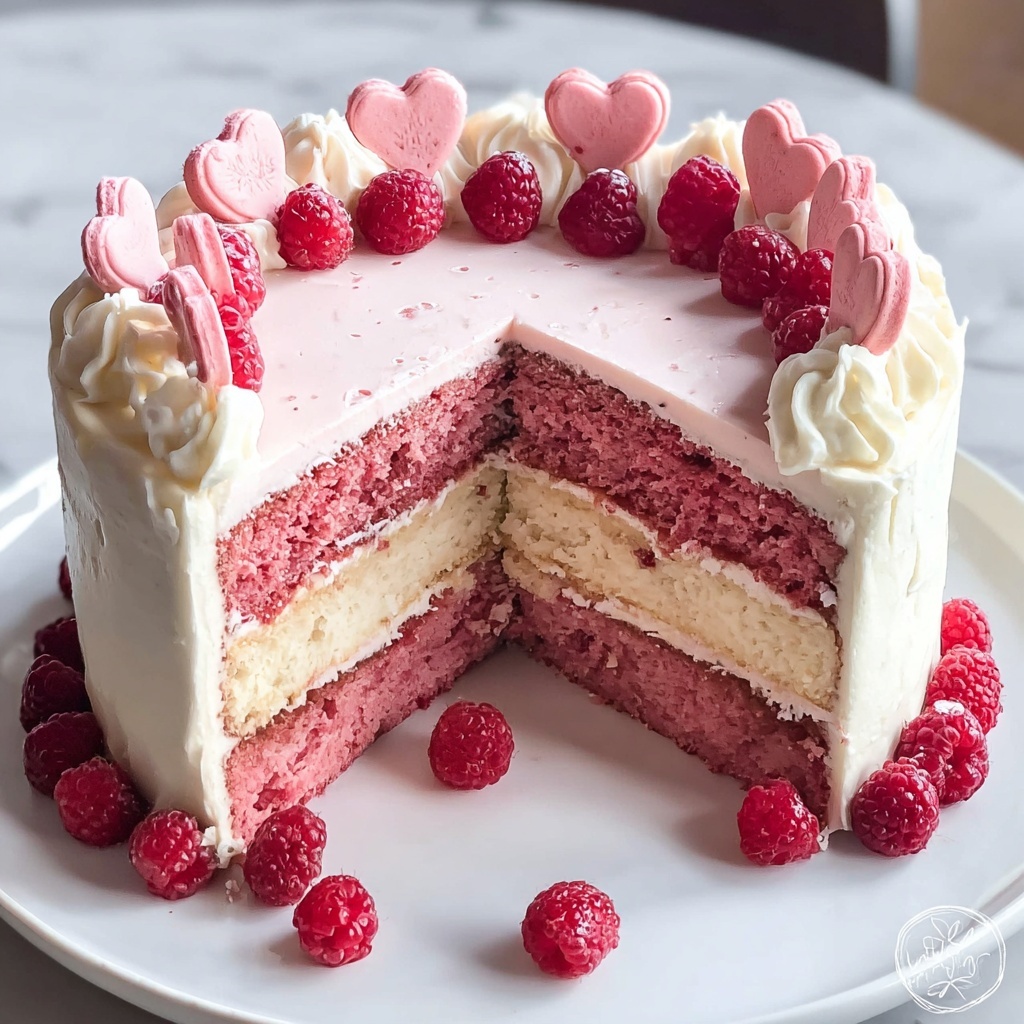
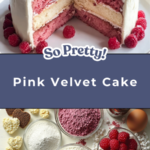
If you are on the lookout for a cake that feels like a warm hug wrapped in a beautiful pink package, then your search ends here. The Pink Velvet Cake: A Delightfully Soft Celebration Treat Recipe is a perfect balance of tender crumb and subtle chocolatey notes, all dressed up in the most charming rosy hue imaginable. It’s the kind of dessert that turns any occasion into a joyous celebration, soft enough to melt in your mouth, and irresistibly elegant to impress your guests. Whether you’re baking for a birthday, a tea party, or simply to treat yourself, this recipe promises both delight and ease, making it a new favorite you’ll want to return to again and again.
Ingredients You’ll Need
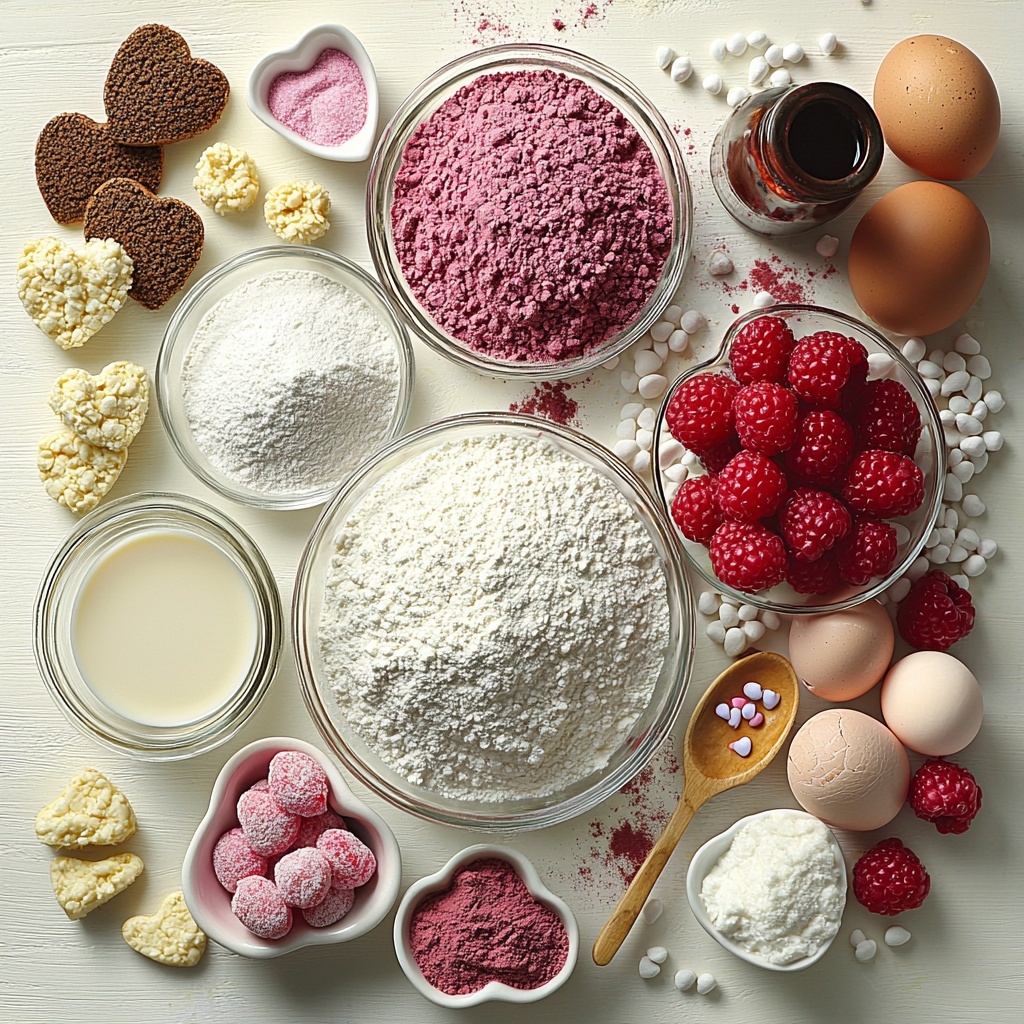
Before we dive into the baking fun, let’s appreciate how straightforward and essential these ingredients are. Each item plays its role in creating the perfect softness, color, and rich flavor that make this Pink Velvet Cake: A Delightfully Soft Celebration Treat Recipe so special.
- 2 cups All-Purpose Flour: Use carefully measured flour to keep the cake tender and avoid dryness.
- 0.5 cups Cornflour: Adds lightness; if unavailable, extra all-purpose flour works fine too.
- 1 tablespoon Baking Powder: Fresh baking powder ensures that lovely rise and fluffiness.
- 1 teaspoon Baking Soda: Skip if you use self-raising flour, but it helps balance the acidity here.
- 0.5 cups Unsweetened Cocoa Powder: Creates that subtle chocolate undertone; tone down if you prefer a paler pink.
- 1 teaspoon Salt: Just enough to balance sweetness and enhance flavor complexity.
- 1 cup Soft Butter: At room temperature for perfect creaming and smooth batter.
- 2 cups Fine Sugar: Fine sugar provides a creamier texture than granular sugar.
- 3 Large Eggs: Room temperature eggs improve mix and texture for a tender crumb.
- 1 cup Milk: Buttermilk is a lovely swap for deeper flavor and moistness.
- 1 tablespoon White Vinegar: Adds tang to react with baking soda for fluffiness; lemon juice works too.
- 1 teaspoon Vanilla Essence: Brings comforting sweetness and depth.
- 0.5 cups Vegetable Oil: Neutral oil keeps the cake moist without interfering with flavor.
- 1 tablespoon Pink Food Color: For that signature blush; natural alternatives like beet juice can be used.
- 8 oz Cream Cheese: The star of the frosting, creamy and slightly tangy.
- 0.5 cups Softened Butter: Whipped into frosting for richness and smooth texture.
- 4 cups Icing Sugar: Powdered sugar ensures the frosting is silky and sweet.
- 1 teaspoon Vanilla Essence: A little extra flavor boost in the frosting.
- 1 cup Fresh Raspberries: Adds freshness and a vibrant contrast in flavor and color.
- Heart-Shaped Biscuits/Sugar Pearls (Optional): For that whimsical final touch perfect for festive occasions.
How to Make Pink Velvet Cake: A Delightfully Soft Celebration Treat Recipe
Step 1: Prepare the Tangy Milk Mixture
Start by combining 1 cup of milk with 1 tablespoon of white vinegar in a small bowl. Stir gently and let this mixture sit for about 5 minutes. This creates a buttermilk-like acid that reacts with the baking soda to help your Pink Velvet Cake rise and achieve that wonderfully soft texture.
Step 2: Mix the Dry Ingredients
In a large bowl, sift together the all-purpose flour, cornflour, cocoa powder, baking powder, baking soda, and salt. Sifting these ingredients together not only eliminates lumps but ensures a light, even distribution of leavening agents, which means an evenly textured cake.
Step 3: Cream Butter and Sugar
Using a stand mixer, beat the 1 cup of softened butter with 2 cups of fine sugar until the mixture turns pale and fluffy — this usually takes about 3 to 5 minutes. This step is key for incorporating air, giving your cake that tender lift and creamy crumb that makes the Pink Velvet Cake truly so soft.
Step 4: Add Eggs, Vanilla, and Oil
Turn your mixer to low speed and add the eggs one at a time, carefully blending each before the next. Then mix in 1 teaspoon of vanilla essence and the ½ cup of vegetable oil. This method ensures your batter stays smooth and emulsified, creating a melt-in-the-mouth feel.
Step 5: Combine Wet and Dry Ingredients
Gradually pour the tangy milk mixture into the wet batter while gently folding in the sifted dry ingredients. Be careful not to overmix; a gentle hand here keeps the cake tender and airy. Once combined, stir in the pink food coloring until the batter reaches that perfect rosy shade.
Step 6: Bake the Cake Layers
Divide the batter evenly into prepared cake pans. Bake in a preheated oven at 180°C (350°F) for 30 to 35 minutes. The layers will rise beautifully, and a toothpick inserted into the center should come out clean when done. Let the cakes cool completely before frosting.
Step 7: Make the Cream Cheese Frosting
In a medium bowl, beat together the cream cheese, softened butter, icing sugar, and vanilla essence until the frosting is creamy and smooth. This luscious frosting offers the perfect balance of tang and sweetness to complement the cake’s delicate crumb.
Step 8: Assemble and Decorate
Once the cakes are fully cooled, spread the cream cheese frosting generously between layers and all over the top and sides. Refrigerate the assembled cake for about 20 minutes to set the frosting. Finally, decorate with fresh raspberries and optional heart-shaped biscuits or sugar pearls for that extra touch of celebration sparkle.
How to Serve Pink Velvet Cake: A Delightfully Soft Celebration Treat Recipe
Garnishes
Fresh raspberries are a natural choice to garnish this cake, providing a bright pop of color and tartness that contrasts beautifully with the sweet cream cheese frosting. Heart-shaped biscuits and sugar pearls add a whimsical flair, perfect for birthdays or romantic occasions, making every slice look like a little masterpiece.
Side Dishes
This cake pairs wonderfully with a light cup of tea or freshly brewed coffee to balance the richness. For an extra indulgent touch, consider serving alongside a scoop of vanilla ice cream or a dollop of whipped cream, which amplifies the softness and velvety texture of the cake.
Creative Ways to Present
Try layering the cake with alternating pink and white frosting stripes on the sides for a playful effect. For celebrations, cut the cake into petite squares and serve them as elegant mini bites at a party. You can also top with edible flowers or a drizzle of white chocolate for a stunning finish that wows your guests.
Make Ahead and Storage
Storing Leftovers
Any leftover Pink Velvet Cake should be stored in an airtight container in the refrigerator to keep the frosting fresh and creamy. It will stay deliciously moist for up to 3 days, giving you plenty of time to enjoy every bite without hurry.
Freezing
You can freeze the cake layers before frosting by wrapping them tightly in plastic wrap and aluminum foil. When wrapped well, the cake keeps for up to 2 months in the freezer. Thaw in the refrigerator overnight before frosting and serving to preserve its softness and flavor.
Reheating
If you prefer your cake slightly warmer, bring slices to room temperature before enjoying. Avoid microwave reheating as it could affect the frosting texture. Instead, let the cake stand out of the fridge for about 30 minutes, allowing the cream cheese frosting to soften perfectly.
FAQs
Can I use natural food coloring instead of artificial pink food color?
Absolutely! Beet juice is a fantastic natural alternative that will give your Pink Velvet Cake a lovely rosy hue without using artificial dyes. Just add it gradually to achieve your desired shade.
Is it necessary to use vinegar in the recipe?
Yes, the vinegar reacts with the baking soda to create carbon dioxide, which helps the cake rise and develop that soft crumb. However, lemon juice can be used as a substitute without compromising the texture.
Can I make this cake gluten-free?
You can experiment with gluten-free flour blends, but results may vary. Using a blend that includes xanthan gum can help mimic the texture of all-purpose flour in this recipe.
What is the best way to prevent the cake from drying out?
Careful measuring of flour, avoiding overbaking, and storing the cake properly in an airtight container can keep your Pink Velvet Cake moist and tender. The combination of oil and butter also contributes to the luscious moistness.
Can I substitute cream cheese frosting with another type?
Cream cheese frosting is classic for this cake, adding tang and richness, but buttercream or mascarpone frosting can work well too. Just remember these variations might alter the flavor profile slightly.
Final Thoughts
This Pink Velvet Cake: A Delightfully Soft Celebration Treat Recipe truly feels like a gift to anyone lucky enough to taste it. Its tender crumb, subtle chocolate warmth, and beautiful blush color come together in a cake that is both elegant and approachable. So why wait? Gather your ingredients, put on your apron, and create a cake that’s destined to become a new celebration tradition in your home. I promise, every bite will bring a smile and a little extra joy to your day.
Print
Pink Velvet Cake: A Delightfully Soft Celebration Treat Recipe
- Prep Time: 25 minutes
- Cook Time: 35 minutes
- Total Time: 1 hour 15 minutes
- Yield: 12 servings
- Category: Baking
- Method: Baking
- Cuisine: American
Description
This Pink Velvet Cake is a delightfully soft and moist celebration treat, featuring a tender crumb tinted with a charming pink hue and layered with luscious cream cheese frosting. Perfect for birthdays, special occasions, or anytime you want a visually stunning and deliciously rich cake that combines the subtle cocoa flavor with a hint of tang from buttermilk and vinegar.
Ingredients
Cake Batter
- 2 cups All-Purpose Flour (Avoid over-measuring to prevent dryness.)
- 0.5 cups Cornflour (Can substitute with more all-purpose flour if unavailable.)
- 1 tablespoon Baking Powder (Ensure it’s fresh for optimal effectiveness.)
- 1 teaspoon Baking Soda (Omit if using self-raising flour.)
- 0.5 cups Unsweetened Cocoa Powder (Feel free to reduce for a paler cake.)
- 1 teaspoon Salt (Balances sweetness for a well-rounded taste.)
- 1 cup Soft Butter (Ensure it’s at room temperature for easier creaming.)
- 2 cups Fine Sugar (Can substitute with granulated sugar but note that texture may vary.)
- 3 Large Eggs (Using eggs at room temperature helps with incorporation.)
- 1 cup Milk (Consider buttermilk for added flavor.)
- 1 tablespoon White Vinegar (Can substitute with lemon juice.)
- 1 teaspoon Vanilla Essence (Extract can offer a stronger flavor.)
- 0.5 cups Vegetable Oil (Substitute with other neutral oils as desired.)
- 1 tablespoon Pink Food Color (Natural alternatives include beet juice.)
Frosting and Decoration
- 8 oz Cream Cheese (Mascarpone can serve as an alternative.)
- 0.5 cups Softened Butter
- 4 cups Icing Sugar (Powdered sugar results in a smooth finish.)
- 1 teaspoon Vanilla Essence
- 1 cup Fresh Raspberries (Substitute with strawberries if desired.)
- Heart-Shaped Biscuits/Sugar Pearls (Optional for enhancing visual appeal.)
Instructions
- Prepare Tangy Milk: In a small bowl, combine 1 cup of milk with 1 tablespoon of white vinegar, stirring gently. Let it sit for about 5 minutes to curdle, creating a buttermilk substitute that adds acidity and tenderness to the cake.
- Sift Dry Ingredients: In a large mixing bowl, sift together the all-purpose flour, cornflour, cocoa powder, baking powder, baking soda, and salt to ensure an even distribution and remove lumps.
- Cream Butter and Sugar: Using a stand mixer, beat 1 cup of softened butter and 2 cups of fine sugar together until the mixture becomes pale and fluffy, approximately 3 to 5 minutes, which incorporates air for a light cake texture.
- Add Eggs and Flavorings: With the mixer on low speed, add the large eggs one at a time, mixing well after each addition. Then incorporate 1 teaspoon of vanilla essence and ½ cup of vegetable oil until the batter is smooth and homogenous.
- Combine Wet and Dry: Gradually add the prepared tangy milk to the batter. Then gently fold in the sifted dry ingredients, taking care not to overmix to maintain batter aeration and softness.
- Bake the Cake Layers: Divide the batter evenly into prepared cake pans. Bake in a preheated oven at 180°C (350°F) for 30 to 35 minutes or until a toothpick inserted in the center comes out clean.
- Prepare the Cream Cheese Frosting: In a medium bowl, beat 8 oz of cream cheese, ½ cup of softened butter, 4 cups of icing sugar, and 1 teaspoon of vanilla essence together until smooth and creamy.
- Assemble the Cake: Once the cake layers have fully cooled, spread cream cheese frosting between the layers, then cover the top and sides evenly with the remaining frosting.
- Chill and Decorate: Refrigerate the assembled cake for about 20 minutes to allow the frosting to set. Decorate the top with fresh raspberries and optionally add heart-shaped biscuits or sugar pearls for an elegant finishing touch.
Notes
- Ensure butter and eggs are at room temperature for better mixing and final texture.
- To achieve a paler pink color, reduce the amount of cocoa powder slightly.
- Use fresh baking powder and baking soda for optimal rise.
- If pink food coloring is not available, natural alternatives like beet juice or powdered beetroot can be used.
- Substitute buttermilk for milk and vinegar for a richer flavor profile if available.
- Store the cake refrigerated and consume within 3 days for best freshness.
- For a gluten-free version, substitute flours with a gluten-free all-purpose blend and omit cornflour if not suitable.
