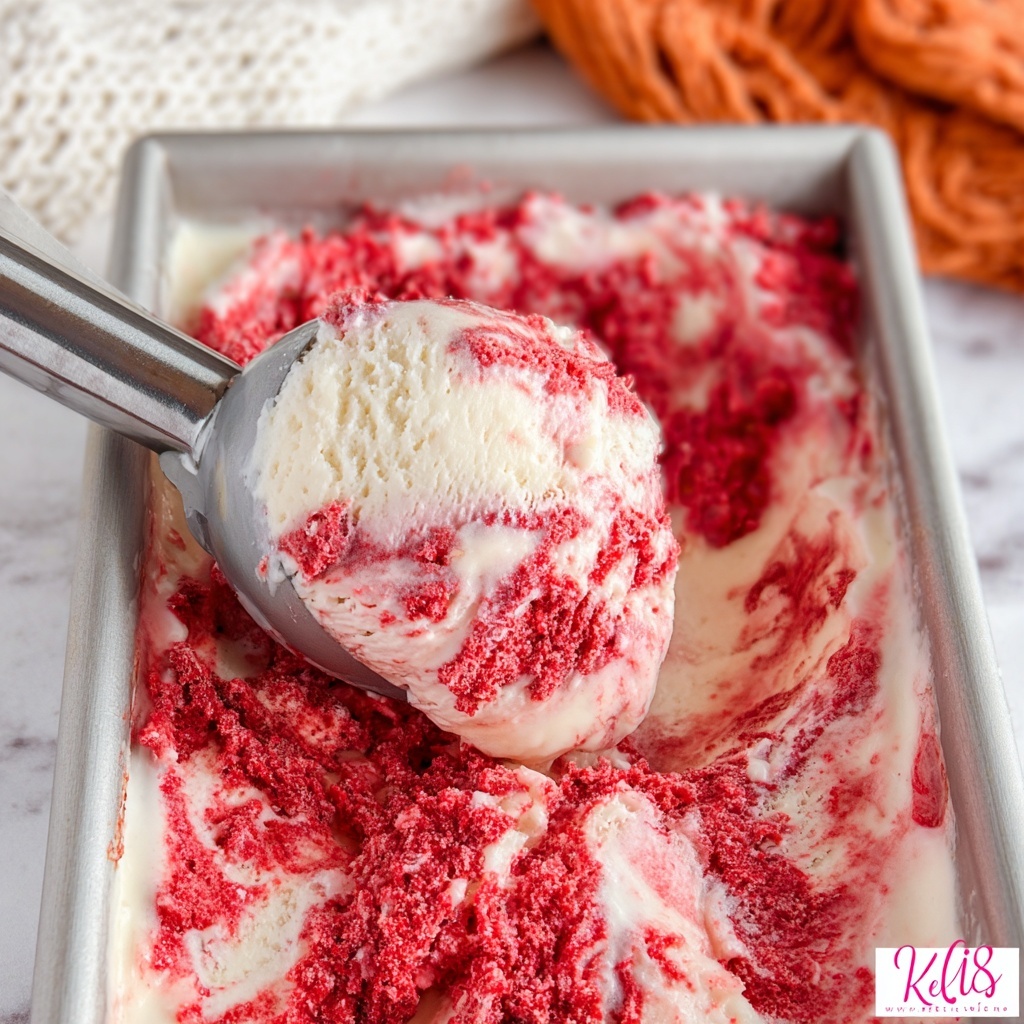
If you have a soft spot for the luxurious flavors of red velvet cake and the creamy chill of ice cream, you’ll absolutely adore this Homemade Red Velvet Ice Cream Recipe. It’s everything you love about that classic cake transformed into a dreamy frozen delight, bursting with velvety cocoa undertones, just the right amount of tang, and those little cake crumbles that make each bite unforgettable. Trust me, once you try making this at home, it’ll quickly become your go-to dessert for impressing friends or treating yourself to something truly special.
Ingredients You’ll Need
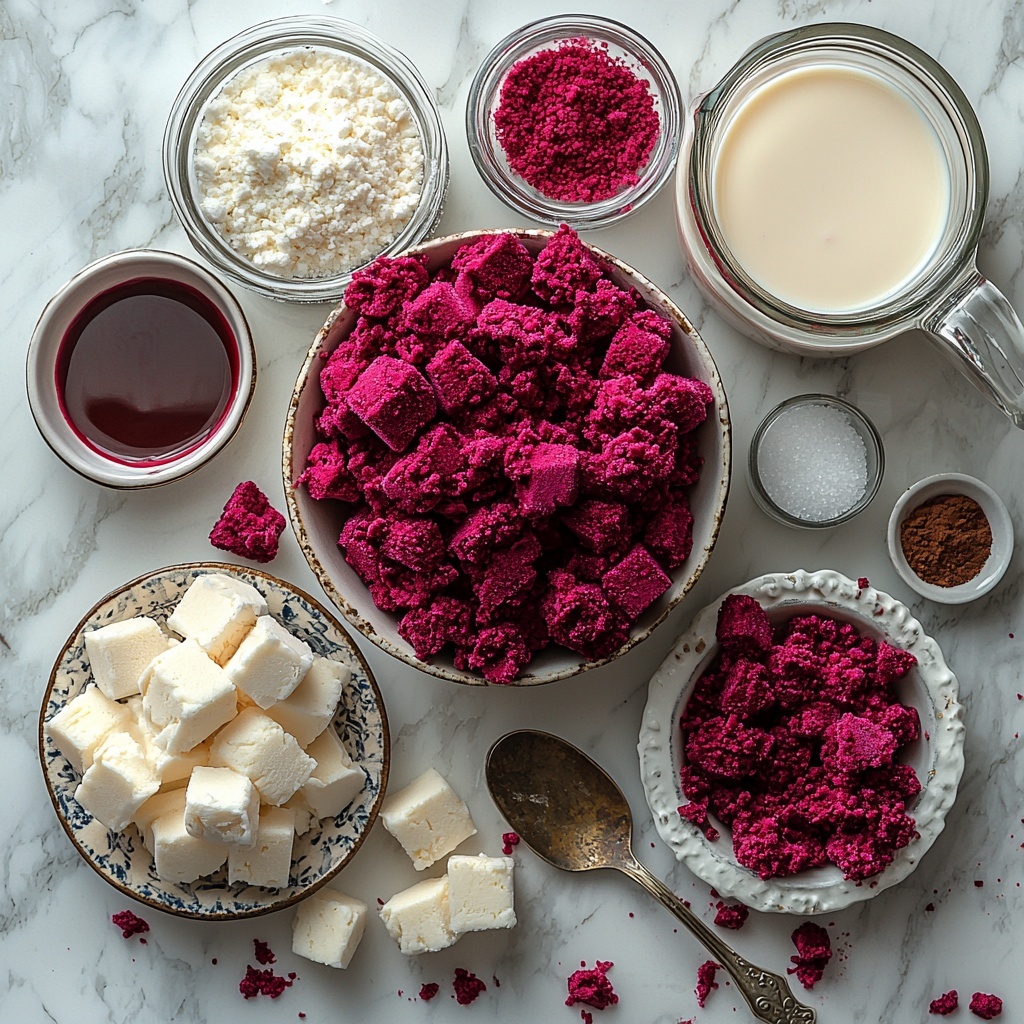
The beauty of this Homemade Red Velvet Ice Cream Recipe is how straightforward and thoughtful the ingredients are. Each one plays a crucial role, whether it’s creating that signature red velvet flavor, ensuring a silky texture, or giving you that vibrant, crowd-pleasing color.
- 1 cup heavy cream: Rich and creamy, it’s the star that makes the ice cream luscious and smooth.
- 1 cup whole milk: Adds the perfect balance to the cream, keeping the texture light but still indulgent.
- 3/4 cup granulated sugar: Sweetens the mixture evenly, ensuring every scoop has just the right amount of sweetness.
- 2 tablespoons unsweetened cocoa powder: Brings that subtle chocolate note essential to authentic red velvet flavor.
- 1 teaspoon vanilla extract: Enhances all the flavors with warm, familiar depth.
- 1 teaspoon white vinegar: Provides the classic tang that mimics the buttermilk taste found in red velvet cake.
- 1–2 teaspoons red food coloring (gel or liquid): Creates that iconic, eye-catching red hue without altering the taste.
- 1 cup crumbled red velvet cake or cupcakes: The magic touch that adds texture and bursts of cake to every spoonful.
- Pinch of salt: Balances sweetness and amplifies the overall flavors beautifully.
How to Make Homemade Red Velvet Ice Cream Recipe
Step 1: Mix Your Base Ingredients
Start by whisking together the heavy cream, whole milk, sugar, cocoa powder, vanilla extract, white vinegar, red food coloring, and a pinch of salt in a medium bowl. Whisk until the sugar dissolves and the color is vivid and uniform—this step is key for that classic red velvet base flavor.
Step 2: Chill the Mixture
Place your mixture in the refrigerator for at least 1 to 2 hours, or until it’s very cold. Chilling ensures your ice cream churns smoothly and achieves that perfect creamy consistency rather than icy chunks.
Step 3: Churn the Ice Cream
Pour your chilled mixture into your ice cream maker and churn according to the manufacturer’s instructions. Generally, this takes about 20 to 25 minutes and yields a lovely soft-serve texture that’s creamy and ready for the magic next step.
Step 4: Add the Red Velvet Cake Crumbles
During the last 5 minutes of churning, gently fold in the crumbled red velvet cake. This lets the cake pieces disperse evenly without turning soggy right away, giving you that delightful mix of ice cream and cakey bites.
Step 5: Freeze Until Firm
Transfer the churned ice cream into a freezer-safe container, cover it, and freeze for at least 4 hours or until firm. This resting time lets the flavors meld and the texture set just perfectly for scooping.
How to Serve Homemade Red Velvet Ice Cream Recipe
Garnishes
Turn your Homemade Red Velvet Ice Cream Recipe into an irresistible treat by topping it with extra red velvet cake crumbles or a drizzle of luscious cream cheese frosting. A sprinkle of white chocolate shavings or crushed pecans also adds delightful texture and an elegant look.
Side Dishes
This ice cream pairs wonderfully with fresh berries or a slice of warm chocolate or vanilla cake. For a more indulgent experience, try it alongside a warm brownie or paired with a flaky biscuit for a Southern-inspired dessert platter that will impress every guest.
Creative Ways to Present
Serve scoops in retro glass parfait cups layered with red velvet cake bites and cream cheese frosting for a stunning dessert presentation. You can also sandwich the ice cream between homemade red velvet cookies for a playful twist everyone will love. The possibilities to make this recipe even more exciting are endless!
Make Ahead and Storage
Storing Leftovers
Store any leftover Homemade Red Velvet Ice Cream Recipe in an airtight container in the freezer to keep it fresh and free from freezer burn. Covering the surface with parchment paper before sealing helps preserve the creamy texture for a few weeks.
Freezing
If you’re not planning to enjoy the ice cream right away, freeze fully churned ice cream for at least 4 hours or overnight to allow it to firm up. This step is crucial for a scoopable consistency that holds shape beautifully when served.
Reheating
Ice cream isn’t meant to be reheated, but if it becomes too hard after extended freezing, let it sit at room temperature for about 5 to 10 minutes before scooping—this will soften it just enough without losing texture or flavor.
FAQs
Can I make Homemade Red Velvet Ice Cream Recipe without an ice cream maker?
Absolutely! Just freeze the mixture in a shallow pan and stir every 30 minutes for 2 to 3 hours to break up ice crystals. Fold in the cake crumbles before the final freeze to ensure even distribution. This method requires a bit of patience but is just as rewarding.
What can I use instead of red food coloring?
You can experiment with natural alternatives like beet juice or pomegranate juice for coloring, but keep in mind they may slightly affect the flavor and intensity of the red velvet color.
Is it possible to make this recipe vegan or dairy-free?
While the original recipe relies on dairy for its creamy texture, you can substitute coconut cream and almond or oat milk for a vegan version, but results will differ slightly in taste and creaminess.
Can I add cream cheese to the ice cream base?
Yes! Swirling in softened cream cheese before the final freeze adds a delicious tang and a classic red velvet cake element to your ice cream, making it even richer and more decadent.
How long will the ice cream last in the freezer?
Stored properly in an airtight container, this Homemade Red Velvet Ice Cream Recipe can last up to 2 weeks in the freezer while maintaining optimal flavor and texture.
Final Thoughts
If you’re on the hunt for a show-stopping dessert that feels like a hug in a bowl, you simply have to try this Homemade Red Velvet Ice Cream Recipe. It’s effortless to make, deeply satisfying, and packed with that nostalgic red velvet charm we all adore. Whether you’re cooling down on a sunny day or ending a dinner party with a smile, this ice cream will quickly become a beloved staple in your recipe collection. Get ready to fall in love with every luscious, velvety scoop!
Print
Delicious Recipe
- Prep Time: 10 minutes
- Cook Time: 0 minutes
- Total Time: 4 hours 10 minutes
- Yield: 6 servings
- Category: Dessert
- Method: No-Cook
- Cuisine: American
- Diet: Vegetarian
Description
This Homemade Red Velvet Ice Cream recipe combines the classic flavors of red velvet cake with creamy, rich ice cream for a delightful dessert. Made with heavy cream, whole milk, cocoa powder, and real red velvet cake crumbles, this ice cream is perfect for red velvet lovers looking for a unique frozen treat that’s easy to make at home.
Ingredients
Ice Cream Base
- 1 cup heavy cream
- 1 cup whole milk
- 3/4 cup granulated sugar
- 2 tablespoons unsweetened cocoa powder
- 1 teaspoon vanilla extract
- 1 teaspoon white vinegar
- 1–2 teaspoons red food coloring (gel or liquid)
- pinch of salt
Mix-Ins
- 1 cup crumbled red velvet cake or cupcakes (homemade or store-bought)
Instructions
- Prepare the Ice Cream Base: In a medium bowl, whisk together heavy cream, whole milk, granulated sugar, unsweetened cocoa powder, vanilla extract, white vinegar, red food coloring, and a pinch of salt until the mixture is smooth and the sugar is completely dissolved.
- Chill the Mixture: Cover and refrigerate the mixture for at least 1 to 2 hours, or until it is very cold. This step ensures a smoother, creamier texture when churned.
- Churn the Ice Cream: Pour the chilled mixture into an ice cream maker and churn following the manufacturer’s instructions, typically for 20 to 25 minutes, until the ice cream reaches a soft-serve consistency.
- Add Cake Crumbles: In the last 5 minutes of churning, slowly add the crumbled red velvet cake so it mixes evenly throughout the ice cream without breaking down completely.
- Freeze Until Firm: Transfer the churned ice cream to a freezer-safe container. Cover it tightly and freeze for at least 4 hours or until the ice cream is firm enough to scoop.
- Serve: Scoop the ice cream into bowls or cones, and if desired, top with extra red velvet cake crumbles or a drizzle of cream cheese frosting for an indulgent finish.
Notes
- If you don’t have an ice cream maker, pour the prepared mixture into a shallow pan and freeze. Stir every 30 minutes for 2 to 3 hours to prevent large ice crystals.
- After stirring, fold in the red velvet cake crumbles and freeze until fully set.
- For added tanginess, swirl in softened cream cheese before the final freezing stage.
- Use gel food coloring for a more vibrant red color without thinning the mixture.
- Make sure the ice cream base is very cold before churning to ensure a smooth texture.


