“`html
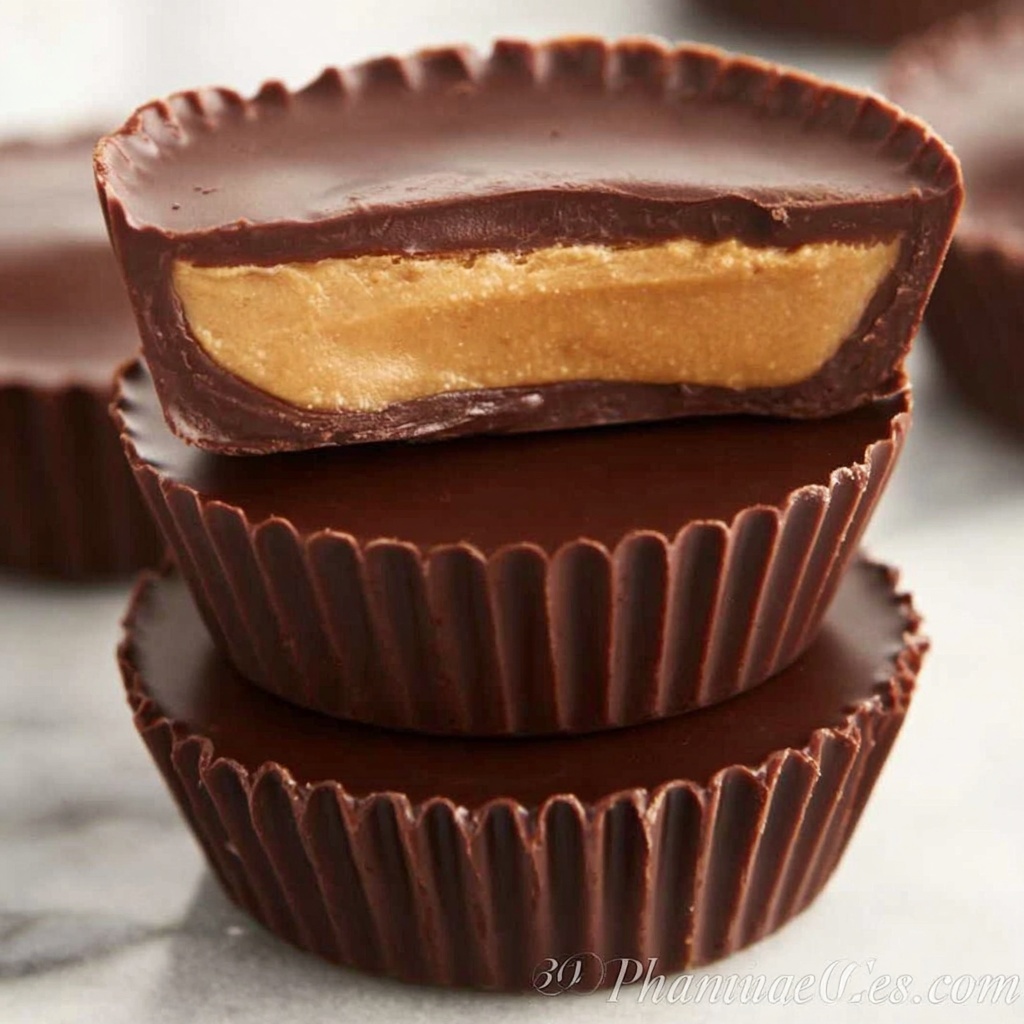
If you adore the classic combination of chocolate and peanut butter but want a healthier twist to keep you energized and satisfied, this Protein Peanut Butter Cups Recipe is your new best friend. Packed with creamy peanut butter, rich semi-sweet chocolate, and a boost of vanilla protein powder, these homemade treats deliver a perfect balance of indulgence and nourishment. They’re simple to make, irresistibly delicious, and ideal for an anytime snack that feels like a guilt-free dessert.
Ingredients You’ll Need
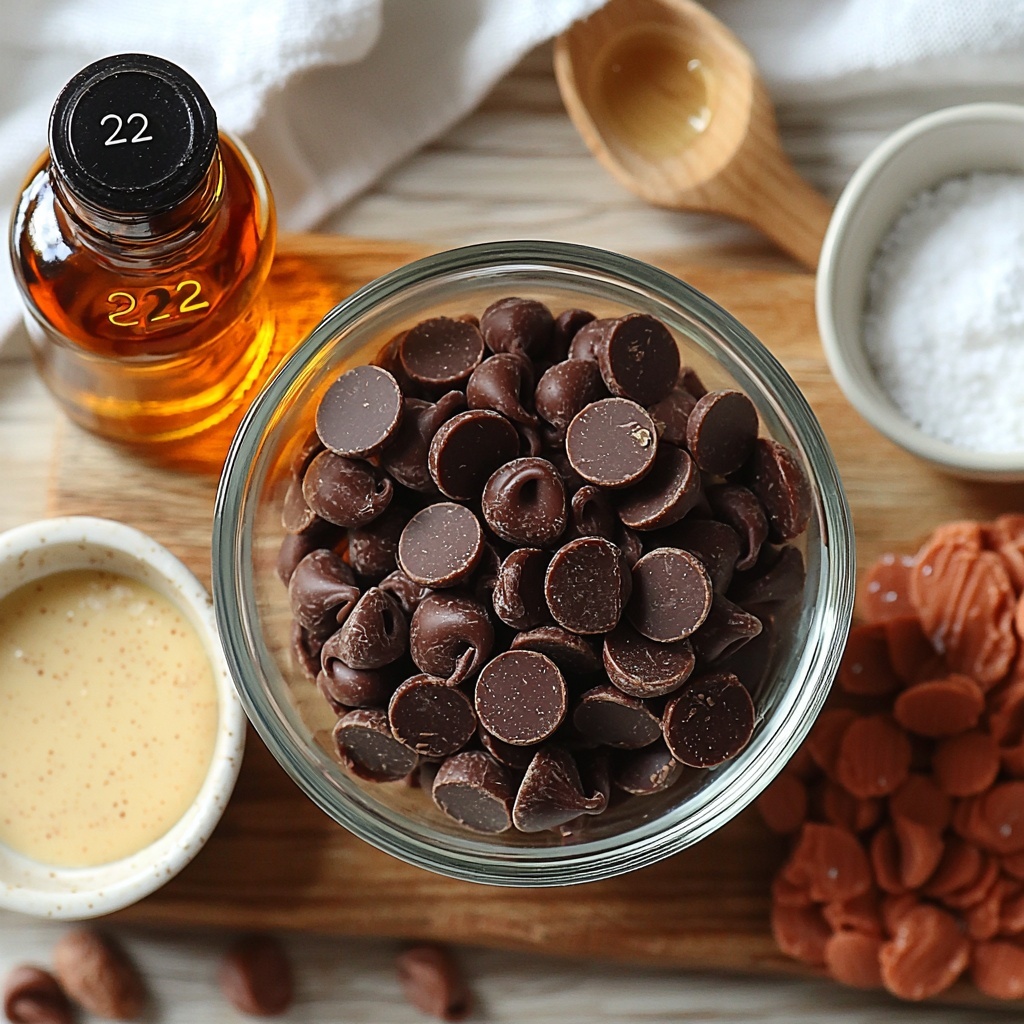
Every ingredient in this recipe is straightforward but essential, blending together to achieve the perfect harmony of taste, texture, and nutrition. From the smooth creaminess of natural peanut butter to the subtle sweetness of pure maple syrup, each element plays a vital role in making these protein-packed peanut butter cups pure magic.
- 12 oz semi-sweet chocolate chips: Provides a luscious, melty chocolate coating that balances sweet and slightly bitter notes perfectly.
- 1 teaspoon coconut oil (solid): Helps to smoothly melt the chocolate and gives the cups a glossy finish.
- 1/4 teaspoon vanilla extract: Adds a warm, aromatic depth that enhances both the peanut butter and chocolate flavors.
- 1/4 cup natural creamy peanut butter (peanuts + salt only): The star ingredient! Its creamy texture and genuine peanut taste bring richness to the filling.
- 2 tablespoons pure maple syrup: Natural sweetness that complements the peanut butter without overpowering.
- 1/3 cup vanilla protein powder: Boosts the protein content while adding a slight vanilla flavor that ties everything together.
- 1/4 teaspoon salt: Balances the sweetness and enhances the depth of flavor throughout the peanut butter filling.
How to Make Protein Peanut Butter Cups Recipe
Step 1: Prepare the Muffin Tin
Start by lining a muffin tin with parchment paper muffin liners. This simple prep step ensures your peanut butter cups won’t stick and makes them super easy to pop out later without breaking.
Step 2: Melt the Chocolate
Place the semi-sweet chocolate chips and solid coconut oil into a microwave-safe bowl. Heat in 30-second intervals, stirring after each, until the mixture is smooth and glossy. Once melted, stir in the vanilla extract to infuse the chocolate with a subtle warmth that complements the peanut butter.
Step 3: Create Chocolate Base Layers
Pour about one heaping teaspoon of the melted chocolate into each muffin liner, spreading it evenly to cover the bottom. This forms the chocolate base and gives your peanut butter cups a sturdy, delicious foundation.
Step 4: Chill the Chocolate
Place the muffin tin in the refrigerator, allowing the chocolate layers to firm up while you prepare the filling. This step is key for keeping the filling nicely sandwiched between chocolate layers.
Step 5: Make the Peanut Butter Filling
Warm the peanut butter briefly in the microwave for 15 to 20 seconds until runny and easy to stir. Combine it with the vanilla protein powder, salt, and maple syrup, mixing until the filling is smooth, creamy, and bursting with flavor.
Step 6: Assemble Peanut Butter Discs
Divide the creamy peanut butter filling into 12 equal portions, shaping each into a disc slightly smaller than the muffin liners. Forming these by hand ensures the perfect size and thickness for each peanut butter cup.
Step 7: Add Filling to Cups
Take the muffin tin out of the fridge, then gently place one peanut butter disc on top of the set chocolate layer in each cup, creating that classic layered look and taste.
Step 8: Add Remaining Chocolate
If your melted chocolate has thickened, pop it back into the microwave for a quick 15 to 20 seconds to soften it again. Use a spoon to drizzle the remaining chocolate evenly over each peanut butter disc, smoothing it out to the edges to seal everything inside.
Step 9: Chill Until Set
Return the tin to the refrigerator and chill the cups for at least one hour, allowing the chocolate and peanut butter layers to fully set and become firm enough to enjoy.
Step 10: Serve and Store
Once set, the peanut butter cups are ready to be devoured! Or, keep them fresh for later by storing leftovers in an airtight container in the refrigerator or freezer.
How to Serve Protein Peanut Butter Cups Recipe
Garnishes
Sprinkle a pinch of flaky sea salt or finely chopped roasted peanuts on top of your peanut butter cups before chilling for a delightful crunch and a lovely contrast that enhances the sweet and salty flavor pairing.
Side Dishes
Serve your Protein Peanut Butter Cups Recipe alongside a cold glass of milk or a cup of rich coffee for the perfect afternoon pick-me-up or post-workout treat. Fresh berries also make a light, refreshing pairing that balances the richness.
Creative Ways to Present
For a fun twist, try layering your peanut butter cups in clear glass jars with granola and sliced bananas for a portable, dessert-inspired snack parfait. Alternatively, gift them in decorative boxes or wrap them individually with parchment ribbon for a thoughtful homemade gift.
Make Ahead and Storage
Storing Leftovers
Keep your leftover Protein Peanut Butter Cups refrigerated in an airtight container for 3 to 4 days to maintain freshness, texture, and flavor. This makes them a convenient ready-to-eat treat whenever you need a quick protein boost.
Freezing
For longer storage, freeze the peanut butter cups in a single layer on a tray until firm, then transfer them to a freezer-safe container or bag. They keep well for up to 1 month and thaw in minutes when you’re ready to enjoy.
Reheating
While these cups are best served chilled or at room temperature, you can bring them back to a soft, melty state by microwaving briefly in 10-second bursts if preferred—just be careful not to overheat and lose that perfect texture.
FAQs
Can I use a different type of protein powder in this Protein Peanut Butter Cups Recipe?
Absolutely! While vanilla protein powder works wonderfully for flavor and texture, you can substitute with chocolate or unflavored protein powders. Just be aware that this might slightly change the taste and sweetness level.
Is it necessary to use parchment paper muffin liners?
Yes, parchment paper liners help prevent sticking and make removing the peanut butter cups so much easier. If you don’t have liners, greasing the tin well is important to avoid breakage.
Can I replace maple syrup with another sweetener?
Definitely. Honey or agave syrup are great alternatives, but maple syrup adds a unique, rich flavor that complements both peanut butter and chocolate, so it’s highly recommended.
How long does the chilling process usually take?
Chilling the chocolate base before adding the filling ensures a solid bottom layer and usually takes about 10 to 15 minutes. After assembly, chilling for at least one hour guarantees firm, perfectly set peanut butter cups.
Can this Protein Peanut Butter Cups Recipe be made vegan?
Yes! Using vegan semi-sweet or dark chocolate chips and a plant-based vanilla protein powder makes this recipe suitable for a vegan diet while keeping all the delicious flavors intact.
Final Thoughts
This Protein Peanut Butter Cups Recipe is one of those delightful homemade snacks that satisfy your sweet tooth while delivering a wholesome protein punch. Easy to make and even easier to love, these little cups are a testament to how simple ingredients can come together into something truly special. I can’t wait for you to try them, share them, and enjoy the comforting joy that each bite brings!
“`
Print
Protein Peanut Butter Cups Recipe
- Prep Time: 20 minutes
- Cook Time: 10 minutes
- Total Time: 1 hour 20 minutes
- Yield: 12 servings
- Category: Dessert
- Method: No-Cook
- Cuisine: American
- Diet: Low Fat
Description
Delicious homemade Protein Peanut Butter Cups combining rich semi-sweet chocolate with a creamy, protein-packed peanut butter filling sweetened naturally with maple syrup. Perfect for a nutritious snack or dessert that satisfies your sweet tooth while boosting your protein intake.
Ingredients
Chocolate Layer
- 12 oz semi-sweet chocolate chips
- 1 teaspoon solid coconut oil
- 1/4 teaspoon vanilla extract
Peanut Butter Filling
- 1/4 cup natural creamy peanut butter (peanuts + salt only)
- 2 tablespoons pure maple syrup
- 1/3 cup vanilla protein powder
- 1/4 teaspoon salt
Instructions
- Prepare the Muffin Tin: Line a muffin tin with parchment paper muffin liners to prevent sticking and to easily remove the peanut butter cups once set.
- Melt the Chocolate: Combine chocolate chips and coconut oil in a microwave-safe bowl. Microwave in 30-second intervals, stirring after each, until melted and smooth. Stir in vanilla extract.
- Create Chocolate Base Layers: Pour a heaping teaspoon of melted chocolate into each muffin liner, spreading to edges to form a flat layer.
- Chill the Chocolate: Refrigerate the muffin tin to set the chocolate base layer firmly.
- Make the Peanut Butter Filling: Microwave the peanut butter for 15-20 seconds until runny. Stir in vanilla protein powder, salt, and maple syrup until combined and creamy.
- Assemble Peanut Butter Discs: Divide the peanut butter mixture into 12 discs, slightly smaller than the muffin liners, shaping them by hand.
- Add Filling to Cups: Remove muffin tin from fridge and place a peanut butter disc on top of each chocolate base.
- Add Remaining Chocolate: If melted chocolate thickened, microwave 15-20 seconds to loosen. Drizzle remaining chocolate over each cup, smoothing to edges to seal filling.
- Chill Until Set: Refrigerate the muffin tin for at least one hour, or until the peanut butter cups are fully set and firm.
- Serve and Store: Enjoy immediately or store leftovers in an airtight container in the fridge or freezer for later snacking.
Notes
- Use parchment paper liners to make removal easy and to prevent sticking.
- The protein powder adds a healthy protein boost—vanilla flavor complements the peanut butter best.
- If chocolate becomes too thick during assembly, reheat briefly to maintain a smooth consistency.
- Store peanut butter cups in the refrigerator for up to 1 week or freeze for longer storage.
- Ensure peanut butter is runny to mix evenly with other filling ingredients.
- Adjust sweetness by adding more or less maple syrup according to taste.
