
“`html
If you’re searching for a festive, fun, and utterly delicious appetizer, this Savory Pumpkin-Shaped Cheese Ball Recipe is an absolute showstopper. It’s creamy, packed with warm autumn flavors, and cleverly shaped to capture the charm of fall’s favorite gourd. Whether you’re hosting a Halloween party, a Thanksgiving gathering, or just craving something comforting and creative, this cheese ball brings such a cozy vibe and always gets guests talking — and dipping!
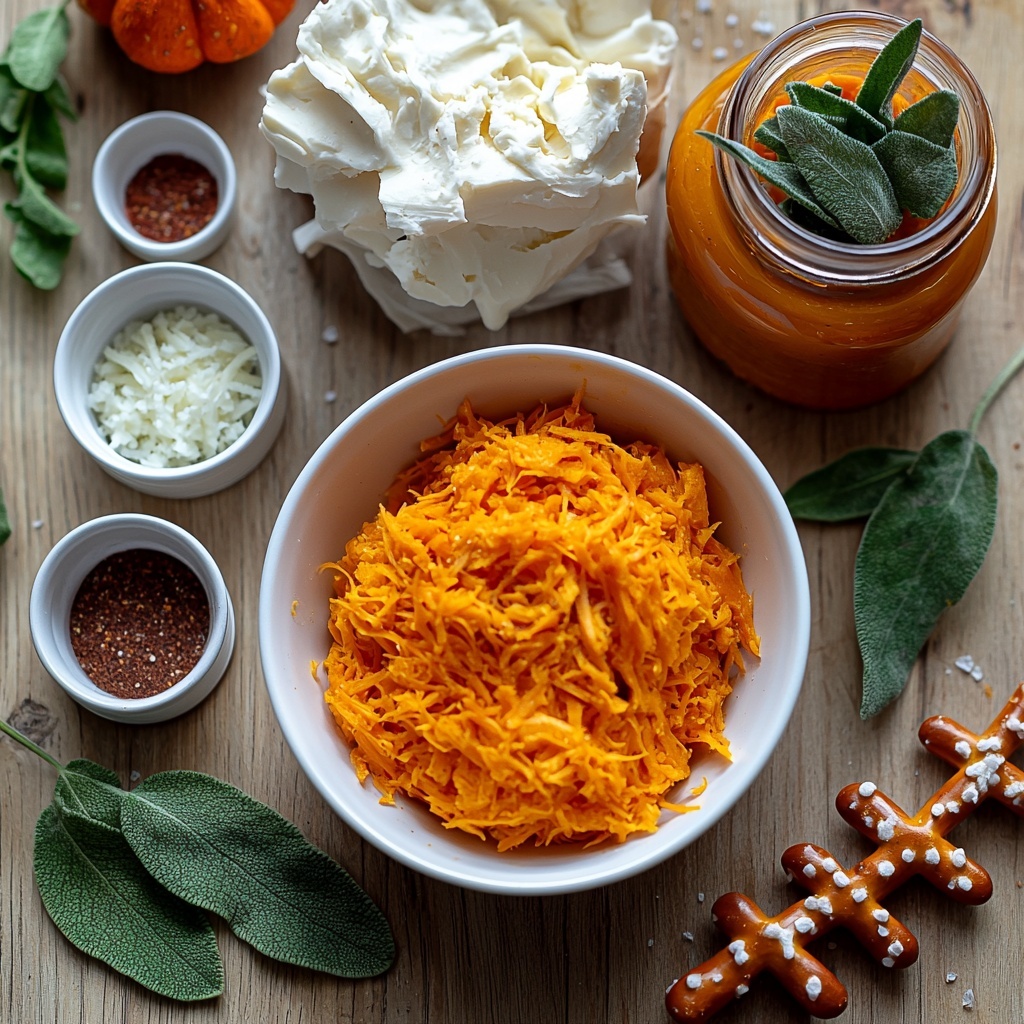
Ingredients You’ll Need
The beauty of this Savory Pumpkin-Shaped Cheese Ball Recipe lies in its deceptively simple ingredients. Each one plays a crucial role in creating a rich and perfectly balanced flavor profile, plus the right texture and that iconic pumpkin hue that makes it so irresistible.
- Cream cheese (16 oz., softened): Acts as the creamy, smooth base that binds all the flavors together effortlessly.
- Cheddar cheese (6 oz. finely shredded, divided): Adds sharpness and texture; some mixed in, some used for coating.
- Pumpkin puree (8 oz., not pumpkin pie filling): Brings natural sweetness and that vibrant pumpkin color.
- Paprika (½ teaspoon): Infuses a subtle smoky warmth that enriches the overall flavor.
- Garlic powder (½ teaspoon): Delivers a gentle savory kick without overpowering the other ingredients.
- Salt (¼ teaspoon, or to taste): Balances and enhances all the flavors perfectly.
- Finely minced sage leaves (2 tablespoons): Adds a fresh, earthy note that screams autumn in every bite.
- Whole sage leaves (2): For garnishing to mimic the pumpkin’s vine and add visual appeal.
- Thick dark pretzel (1): A creative and edible pumpkin stem that adds a delightful crunch.
- Remaining shredded cheddar cheese (6 oz.): Used to coat the cheese ball for extra flavor and a rustic look.
How to Make Savory Pumpkin-Shaped Cheese Ball Recipe
Step 1: Combine Ingredients
Start by grabbing a large mixing bowl and adding half of the shredded cheddar cheese, the softened cream cheese, pumpkin puree, paprika, garlic powder, salt, and the finely minced sage leaves. This combination is where the magic begins — each ingredient blending to create that perfect seasonal flavor blend.
Step 2: Mix Thoroughly
Use a hand mixer or stand mixer on high speed to blend these ingredients until the mixture is smooth and well combined. This step is crucial because a well-mixed base means your cheese ball will have a consistently creamy texture. Give it a quick taste and add a pinch more salt if you feel it needs a little extra oomph.
Step 3: Shape and Chill
Once blended, scrape the mixture with a rubber spatula, forming it roughly into a ball right inside the bowl. Cover it tightly with plastic wrap and pop it into the refrigerator for at least one hour. This resting time helps the cheese ball firm up, making it much easier to shape and coat in the next steps.
Step 4: Prepare Coating
While your cheese ball chills, lay out a clean piece of plastic wrap on your workspace and spread the reserved shredded cheddar cheese onto a plate or shallow dish. This shredded cheese will create a flavorful, rustic coating for your pumpkin cheese ball.
Step 5: Coat the Cheese Ball
Take the chilled cheese ball from the fridge and place it onto the shredded cheddar cheese. Gently roll and press it so it becomes fully coated in the cheese, which adds an extra layer of punch and visual texture reminiscent of a pumpkin’s ribbed surface.
Step 6: Wrap and Shape
Transfer the coated cheese ball to the center of your plastic wrap. Wrap it tight and begin shaping it more carefully into a rounded pumpkin form. Use your hands to smooth it out and refine the curves — this is your chance to give it that authentic, plump pumpkin look.
Step 7: Add Rubber Bands for Texture
To achieve that signature pumpkin ribbing, secure 3 to 4 wide rubber bands evenly spaced around the wrapped cheese ball. This little trick creates charming grooves that make your cheese ball look just like a real pumpkin.
Step 8: Final Chill
Place the wrapped and ribbed cheese ball in the freezer for 30 minutes to firm up or simply refrigerate for up to 3 days if you want to prepare ahead. This step ensures that the shape holds well when you’re ready to serve.
Step 9: Decorate and Serve
When it’s showtime, carefully remove the rubber bands and plastic wrap. Use wet fingers to gently smooth out any cracks or imperfections. Insert a thick piece of pretzel as the pumpkin’s stem and tuck in two whole sage leaves near the top to mimic a vine — these little touches bring your Savory Pumpkin-Shaped Cheese Ball Recipe to life and make it irresistible to guests.
How to Serve Savory Pumpkin-Shaped Cheese Ball Recipe
Garnishes
The final garnishes turn this cheese ball into a festive centerpiece. Using whole sage leaves at the top adds an authentic vine effect, while the thick pretzel stem provides a rustic crunch. If you want to jazz it up further, sprinkle on some extra paprika or add a few toasted pepitas around the serving platter for that extra pop of fall flair.
Side Dishes
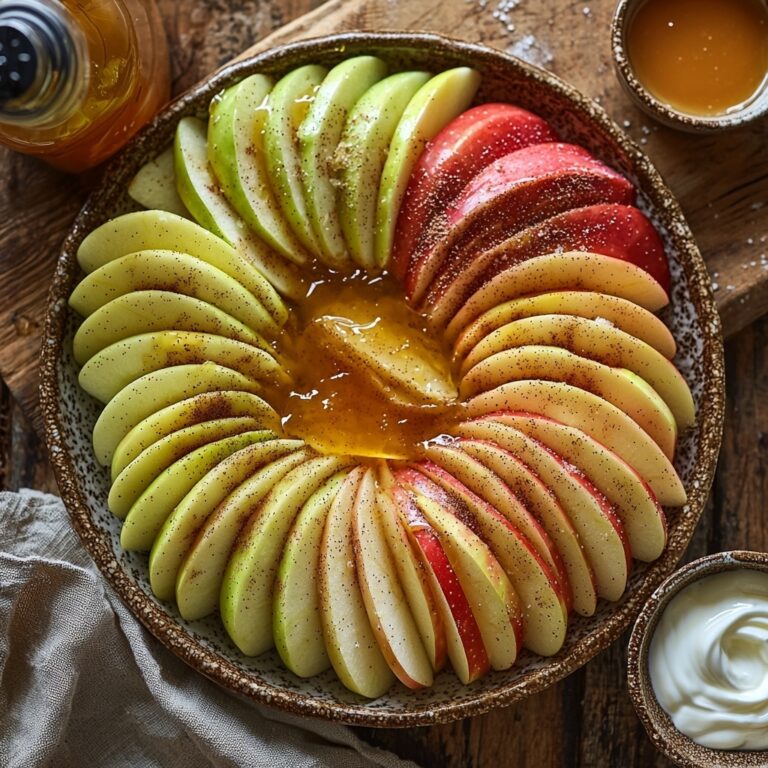
This cheese ball pairs perfectly with an assortment of crackers and pretzels — the crunch contrasts so beautifully with the creamy cheese. You can also serve it alongside sliced apples or pears for a fresh, juicy bite that complements the warmth of the pumpkin and herbs. Warm breadsticks or crusty baguette slices also work wonderfully.
Creative Ways to Present
Imagine placing your pumpkin cheese ball on a bed of fresh autumn leaves or a platter decorated with mini gourds and cranberries for an inviting fall-themed spread. You can even set the cheese ball inside a hollowed-out small pumpkin or decorative bowl to keep the festive vibes going. These little presentation details will have your guests swooning before they even take a bite!
Make Ahead and Storage
Storing Leftovers
If you have any cheese ball left over — although it’s so good, there rarely is — wrap it tightly in plastic wrap and keep it refrigerated. It will stay fresh and flavorful for up to 3-4 days. Be sure to bring it back to room temperature before serving again for the best texture and flavor.
Freezing
This Savory Pumpkin-Shaped Cheese Ball Recipe doesn’t freeze well due to its creamy texture, so it’s best to enjoy it fresh or refrigerated. Freezing can cause the texture to become crumbly and less appealing, detracting from the luxurious creaminess that makes this dish so special.
Reheating
Since this cheese ball is designed to be served cold or at room temperature, reheating is not recommended. Simply allow it to sit out for 15 to 20 minutes before serving if you prefer it slightly softened. This helps unlock the flavors without compromising its shape or spreadability.
FAQs
Can I use pumpkin pie filling instead of pumpkin puree?
You’ll want to stick with plain pumpkin puree, not pumpkin pie filling, because the filling is sweeter and contains added spices that can throw off the balance of this savory cheese ball. The puree provides the perfect mild pumpkin flavor that complements the cheese perfectly.
How long can I prepare the cheese ball ahead of time?
You can prepare and chill the cheese ball up to three days in advance. Just keep it well wrapped in the refrigerator, and add the final garnishes like the pretzel stem and sage leaves right before serving to keep them fresh and crisp.
Can I make this cheese ball vegan or dairy-free?
While this recipe relies on cream cheese and cheddar for its signature taste and texture, you could experiment with vegan cream cheese and dairy-free shredded cheese alternatives, but the flavor and consistency will certainly change. It’s worth a try if you have dietary restrictions!
What can I use instead of the pretzel stem?
If you don’t have a pretzel handy, try using a small cinnamon stick or a short piece of celery for a fun and edible stem alternative. Both add a nice rustic touch while keeping that pumpkin vibe intact.
How do I fix cracks after removing the plastic wrap?
Don’t worry if you see small cracks once you unwrap the cheese ball. Simply wet your fingers with a little water and gently smooth out the imperfections. The moisture helps bind the cheese and patch those cracks seamlessly.
Final Thoughts
This Savory Pumpkin-Shaped Cheese Ball Recipe has become one of my absolute favorites for celebrating the flavors of fall in such a fun and creative way. It’s guaranteed to bring a smile to your guests’ faces and make your party spread stand out. Give it a try, and I promise it will become a seasonal tradition you look forward to year after year!
“`
Print
Savory Pumpkin-Shaped Cheese Ball Recipe
- Prep Time: 15 minutes
- Cook Time: 0 minutes
- Total Time: 1 hour 15 minutes
- Yield: 10 servings
- Category: Appetizer
- Method: No-Cook
- Cuisine: American
- Diet: Vegetarian
Description
Create a festive and flavorful Savory Pumpkin-Shaped Cheese Ball perfect for fall gatherings. This creamy blend of cream cheese, pumpkin puree, cheddar, and herbs is shaped like a pumpkin and coated with shredded cheddar for a delightful appetizer.
Ingredients
Cheese Ball Mixture
- 16 oz. cream cheese, softened
- 6 oz. cheddar cheese, finely shredded (divided)
- 8 oz. pumpkin puree (not pumpkin pie filling)
- ½ teaspoon paprika
- ½ teaspoon garlic powder
- ¼ teaspoon salt, or to taste
- 2 tablespoons finely minced sage leaves
Decoration
- 2 whole sage leaves (for the pumpkin vine)
- 1 thick dark pretzel (for the pumpkin stem)
- Remaining 6 oz. cheddar cheese, finely shredded (for coating)
Instructions
- Combine Ingredients: In a large mixing bowl, add half of the shredded cheddar cheese (6 oz), softened cream cheese, pumpkin puree, paprika, garlic powder, salt, and the finely minced sage leaves. Reserve the remaining shredded cheddar cheese for coating later.
- Mix Thoroughly: Using a hand mixer or stand mixer on high speed, blend the ingredients until smooth and fully combined. Taste the mixture and adjust seasoning with more salt if needed.
- Shape and Chill: Scrape the mixture with a rubber spatula and roughly shape it into a ball inside the bowl. Cover with plastic wrap and refrigerate for at least 1 hour or overnight, allowing it to firm up for easier handling.
- Prepare Coating: On a clean surface, lay out a large piece of plastic wrap. Spread the reserved shredded cheddar cheese on a plate.
- Coat the Cheese Ball: Remove the chilled cheese mixture from the bowl and place it onto the shredded cheddar cheese on the plate. Roll and press gently to fully coat the ball with cheese.
- Wrap and Shape: Transfer the coated cheese ball to the center of the plastic wrap. Wrap it tightly and use your hands to refine and smooth the pumpkin shape.
- Add Rubber Bands: Place 3 to 4 wide rubber bands evenly spaced around the wrapped cheese ball to create a ribbed pumpkin effect.
- Final Chill: Place the wrapped cheese ball in the freezer for 30 minutes to firm up or refrigerate for up to 3 days until ready to serve.
- Decorate and Serve: When ready to serve, carefully remove the rubber bands and plastic wrap. Use wet fingers to patch any cracks or imperfections. Insert a thick broken pretzel piece as the pumpkin stem and arrange two whole sage leaves near the top to resemble a pumpkin vine. Serve cold or at room temperature with crackers or pretzels.
Notes
- Use pumpkin puree and not pumpkin pie filling for the best texture and flavor balance.
- Be sure to chill the cheese ball thoroughly to help it firm up for shaping and coating.
- Adjust salt and seasonings according to taste before chilling.
- This cheese ball can be made a day ahead and kept refrigerated, or briefly frozen to firm up before serving.
- The pretzel stem and sage leaves make a charming, edible decoration enhancing the festive look.

