
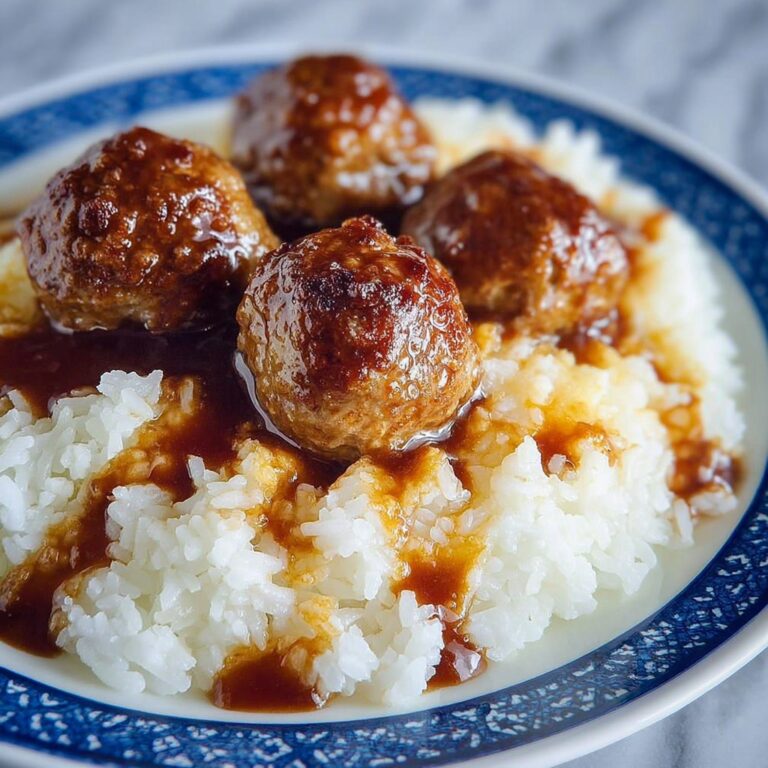
If you’ve ever craved a snack that’s bursting with flavor, creamy texture, and a crispy golden crust, then let me introduce you to my favorite: Irresistible Traditional Coxinhas: Brazilian Chicken Croquettes Recipe. This beloved Brazilian treat combines a rich, tender shredded chicken filling with a pillowy outer shell made from mashed potatoes and flour, all perfectly fried to crispy perfection. Whether you’re serving them at a party or simply treating yourself, these coxinhas always bring smiles to the table and keep everyone coming back for more.
Ingredients You’ll Need
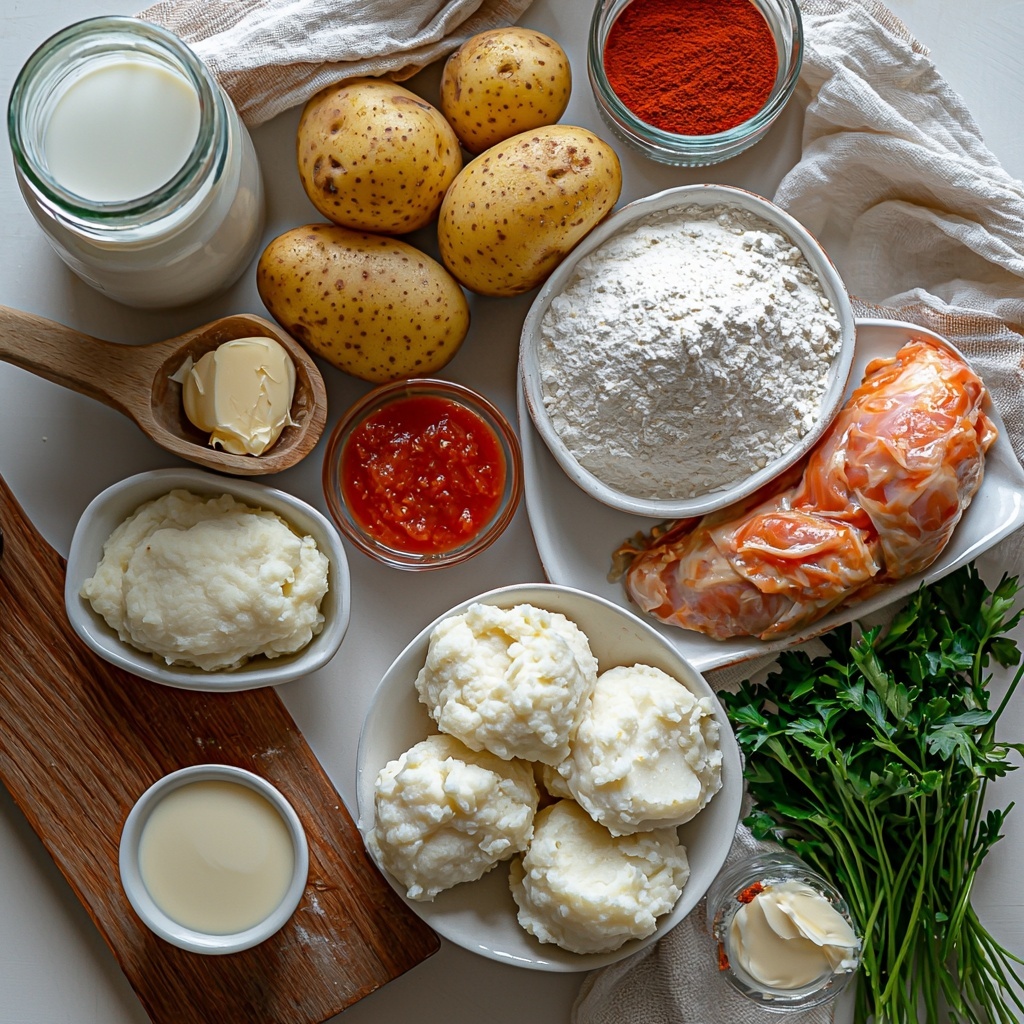
Don’t let the list intimidate you; these ingredients are simple staples that come together beautifully to create the authentic taste and comforting texture that make coxinhas so special. Each component plays an essential role, from the creamy chicken filling to the delicate, golden crust.
- 1 ¾ cups (450 ml) milk: Key for making the dough tender and smooth.
- 1 ¾ cups (450 ml) chicken broth or water: Adds flavor depth to the dough.
- 1 tablespoon salt: Enhances all the flavors throughout the dish.
- 3 ½ tablespoons (50 g) butter (for the dough): Keeps the dough silky and soft.
- 2 large potatoes, peeled and mashed (about 625 g): Creates the dough’s fluffy base and adds heartiness.
- 3 ½ cups (450 g) all-purpose flour, sifted: Binds the dough together just right.
- 2 large boneless skinless chicken breasts (about 300 g): The star protein, shredded finely for the filling.
- ¼ cup (1/2 stick / 2 oz) butter (for the filling): Infuses richness into the chicken mixture.
- 4 cloves garlic, minced or grated: Brings savory aroma and kick.
- 1 small onion, finely chopped or grated: Adds sweetness and texture.
- 1 tablespoon paprika (smoked or sweet): Adds warmth and vibrant color.
- 4 tablespoons cream cheese (for the filling): Creates a luscious, creamy chicken mixture.
- 4 tablespoons tomato passata (or tomato puree): Gives a subtle tang and moisture to the filling.
- Salt and black pepper, to taste: Right seasoning balance is vital for maximum flavor.
- Chopped parsley, to taste: Adds bright freshness to the filling.
- ½ cup milk + 1 tablespoon cornstarch (for eggless wash): Helps breadcrumbs stick perfectly.
- Bread crumbs (for coating): Creates that irresistible crunchy outer crust.
- Vegetable oil (for frying): Essential for achieving that perfect golden crisp.
How to Make Irresistible Traditional Coxinhas: Brazilian Chicken Croquettes Recipe
Step 1: Cook and Shred the Chicken
Start by gently simmering the boneless chicken breasts in water with a pinch of salt for 12-15 minutes until they’re cooked through and juicy. Once they cool slightly, shred the chicken finely using two forks or your hands. This shredded chicken forms the hearty core of your coxinhas, ensuring every bite is tender and flavorful.
Step 2: Prepare the Creamy Chicken Filling
Melt butter in a skillet and sauté the onion until it turns soft and translucent. Add garlic and paprika, cooking for about 30 seconds to release their wonderful aromas. Stir in the shredded chicken, cream cheese, and tomato passata, seasoning with salt, pepper, and parsley. Cook the filling gently while the flavors marry beautifully, then set it aside to cool—this step ensures the filling becomes rich and creamy without becoming too runny.
Step 3: Make the Dough
Combine milk, chicken broth (or water), salt, and butter in a saucepan and bring to a boil. Once boiling, add the mashed potatoes, stirring well to combine. Gradually add sifted flour, stirring constantly until a soft, elastic dough forms that pulls away easily from the sides of the pan. This dough should be smooth—soft enough to mold but firm enough to hold the filling without breaking.
Step 4: Shape the Coxinhas
Let the dough cool enough to handle. Then divide it into portions and flatten each piece in your palm. Place spoonfuls of the chicken filling in the center and carefully mold the dough around it, shaping each croquette into a teardrop or drumstick form—a traditional and playful shape that’s just begging to be devoured. Make sure to pinch the edges well to seal in the filling for perfect frying.
Step 5: Coat the Coxinhas
Mix milk with cornstarch to create an eggless wash that helps breadcrumbs adhere beautifully. Dip each shaped coxinha in this wash, then roll them generously in bread crumbs until fully coated. This layer is crucial for that irresistibly crunchy exterior that contrasts so wonderfully with the creamy filling.
Step 6: Fry to Golden Perfection
Heat vegetable oil in a deep pot to a steady medium-high temperature. Fry the coxinhas in batches, turning occasionally, until they reach a gorgeous golden brown, about 3 to 5 minutes. Drain them on paper towels to absorb excess oil and serve immediately for that unbeatable crispy delight.
How to Serve Irresistible Traditional Coxinhas: Brazilian Chicken Croquettes Recipe
Garnishes
Sprinkle freshly chopped parsley or cilantro on top right before serving to add a pop of color and fresh aroma. A side of spicy chili sauce or a dollop of creamy aioli enhances the flavors wonderfully, giving a fun contrast to the savory croquettes.
Side Dishes
Coxinhas shine brightest as finger food but also pair beautifully with a crisp green salad or roasted vegetables for a balanced meal. Classic Brazilian sides like farofa (toasted cassava flour) or rice provide a hearty complement if you’re serving them as part of a larger feast.
Creative Ways to Present
If you’re hosting, arrange coxinhas on a rustic wooden board or colorful platter—add small bowls of dipping sauces like chimichurri, hot sauce, or even a creamy avocado dip for variety. For a fun twist, serve mini coxinhas on skewers for easy party bites everyone can enjoy with one hand.
Make Ahead and Storage
Storing Leftovers
If you happen to have leftovers (though that’s rare!), store cooled coxinhas in an airtight container in the fridge for up to 2 days. Reheating them in the oven helps preserve the crispness better than microwaving.
Freezing
Coxinhas freeze beautifully before frying. Just shape and coat them, then place on a baking sheet lined with parchment paper to freeze individually. Once frozen solid, transfer to a freezer bag and store for up to 1 month. When ready, fry them straight from the freezer—just add a minute or two to the frying time for perfectly crispy results.
Reheating
To bring back the crunch after refrigeration, warm leftovers in a preheated oven at 350°F (175°C) for about 10-15 minutes. This restores the golden crust while heating the creamy interior without drying it out. Avoid microwaving to keep that delightful texture intact.
FAQs
Can I use chicken thighs instead of breasts?
Absolutely! Chicken thighs are even more flavorful and tender. Just simmer them the same way and shred. The slightly richer taste blends perfectly with the creamy filling.
Is it possible to bake instead of frying?
Yes, though frying gives the best signature crunch. If baking, brush the coxinhas lightly with oil and bake at 400°F (200°C) until golden, but expect a slightly softer crust.
How can I make these gluten-free?
Try substituting all-purpose flour with a gluten-free flour blend that works for doughs and use gluten-free breadcrumbs. Just keep an eye on the dough consistency—sometimes adjustments in milk or flour may be needed.
What’s the best way to shape coxinhas neatly?
Keep your hands a little damp to prevent sticking. Flatten the dough thinner in your palm and gently place the filling centrally before folding the dough carefully around it. Practice makes perfect, and the rustic charm is part of the fun!
Can I add cheese to the filling?
Definitely! Adding cubed mozzarella or a bit more cream cheese brings an extra creamy, gooey surprise inside that complements the chicken beautifully.
Final Thoughts
Trying this Irresistible Traditional Coxinhas: Brazilian Chicken Croquettes Recipe promises a delicious journey into Brazilian comfort food that feels like a warm hug. Whether you’re new to cooking coxinhas or a seasoned fan, this recipe makes it easy to create those crispy bites of joy that fill any kitchen with mouthwatering aromas and bring loved ones together. Trust me, once you make these, they’ll be your go-to appetizer for every gathering.
Print
Irresistible Traditional Coxinhas: Brazilian Chicken Croquettes Recipe
- Prep Time: 30 minutes
- Cook Time: 60 minutes
- Total Time: 90 minutes
- Yield: 12–16 servings
- Category: Appetizer
- Method: Frying
- Cuisine: Brazilian
Description
Enjoy these delicious Brazilian Coxinhas, traditional chicken croquettes featuring a creamy shredded chicken filling enveloped in a soft, buttery potato and flour shell, perfectly fried to a crispy golden brown. A classic appetizer that is both comforting and flavorful, ideal for parties or family gatherings.
Ingredients
Dough
- 1 ¾ cups (450 ml) milk
- 1 ¾ cups (450 ml) chicken broth or water
- 1 tablespoon salt
- 3 ½ tablespoons (50 g) butter
- 2 large potatoes, peeled and mashed (about 625 g)
- 3 ½ cups (450 g) all-purpose flour, sifted
Filling
- 2 large boneless skinless chicken breasts (about 300 g)
- ¼ cup (1/2 stick / 2 oz) butter
- 4 cloves garlic, minced or grated
- 1 small onion, finely chopped or grated
- 1 tablespoon paprika (smoked or sweet)
- 4 tablespoons cream cheese
- 4 tablespoons tomato passata (or tomato puree)
- Salt and black pepper, to taste
- Chopped parsley, to taste
Coating and Frying
- ½ cup milk
- 1 tablespoon cornstarch
- Bread crumbs, for coating
- Vegetable oil, for frying
Instructions
- Cook and shred the chicken: Place chicken breasts in a pot and cover with water. Add a pinch of salt and gently simmer for 12-15 minutes until cooked through. Remove chicken, let cool slightly, then shred finely using forks or your hands.
- Prepare the filling: In a skillet, melt ¼ cup butter over medium heat. Sauté the finely chopped onion until soft and translucent. Add the minced garlic and paprika, cooking for about 30 seconds until fragrant. Stir in the shredded chicken, cream cheese, and tomato passata. Season with salt, black pepper, and chopped parsley to taste. Remove from heat and let cool completely.
- Make the dough: In a saucepan, combine the milk, chicken broth, salt, and butter. Bring the mixture to a boil over medium heat. Add the mashed potatoes and stir until smooth. Gradually add the sifted flour, stirring continuously until a dough forms that pulls away from the sides of the pan. Remove from heat and let the dough cool enough to handle.
- Shape the coxinhas: Divide the dough into equal portions. Flatten each portion into a disc using your hands. Place a spoonful of the cooled chicken filling in the center. Mold the dough around the filling, shaping each piece into a teardrop or drumstick shape, ensuring the filling is fully enclosed and sealed.
- Prepare the coating: Mix ½ cup milk with 1 tablespoon cornstarch to create an eggless wash. Roll each shaped coxinha in this milk-cornstarch mixture, then coat thoroughly with bread crumbs to create a crispy crust after frying.
- Fry the coxinhas: Heat vegetable oil in a deep pot or deep-fryer to 350°F (175°C). Fry coxinhas in batches, avoiding overcrowding, for 3-5 minutes or until they are golden brown and crispy. Remove with a slotted spoon and drain on paper towels. Serve hot for the best taste and texture.
Notes
- For an authentic soft texture, use mashed potatoes that are hot and smooth when mixing the dough.
- Ensure filling is cooled completely before placing it into the dough to prevent tearing.
- The milk and cornstarch wash is a great eggless alternative to help bread crumbs stick perfectly.
- Use a thermometer to maintain the oil temperature for even frying and to prevent greasy coxinhas.
- Leftover coxinhas can be reheated in an air fryer or oven to restore crispiness.


