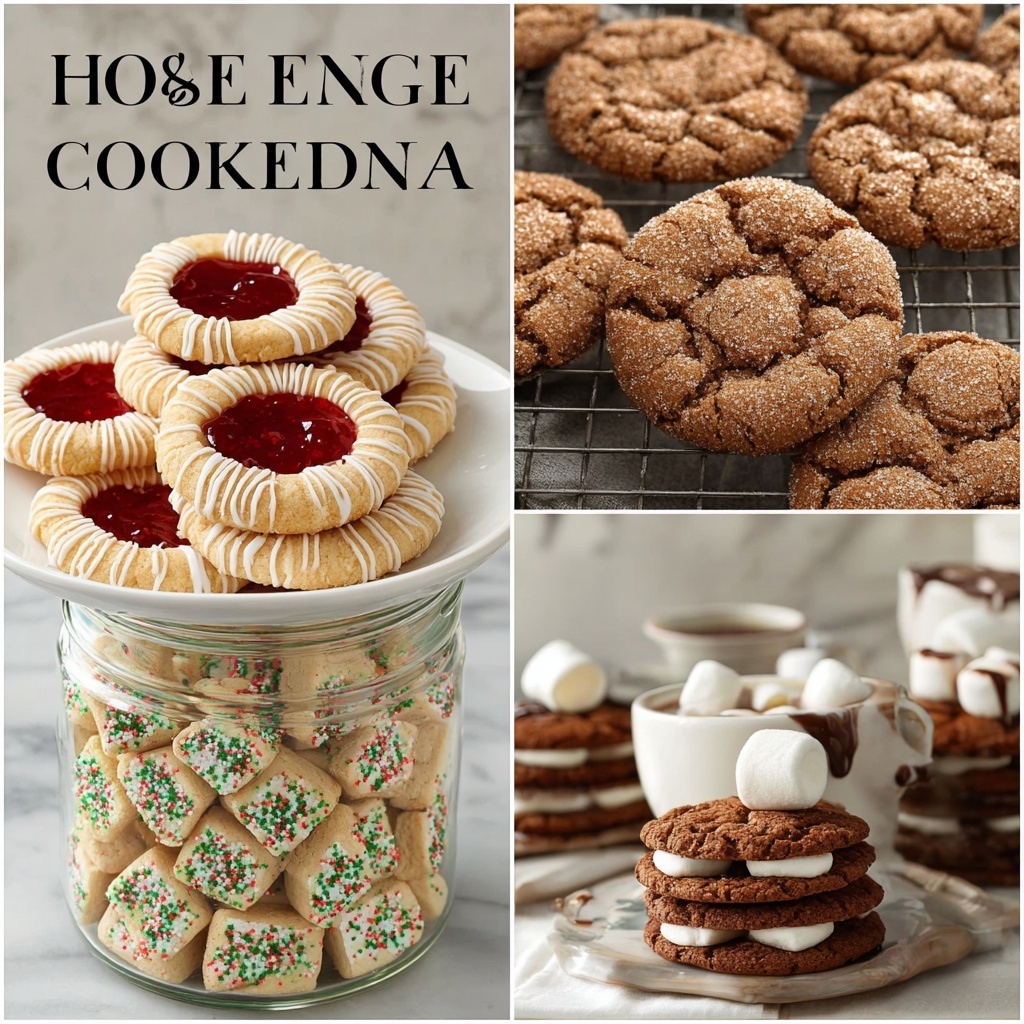
There is something truly magical about gathering friends and family around a table brimming with homemade treats, laughter, and holiday cheer. If you’ve ever wondered how to bring that joy home, then this comprehensive guide on How to Host a Cookie Exchange Party (Cookie Swap Guide) Recipe is just the perfect place to start. It’s not just about cookies; it’s about creating a warm, inviting atmosphere where everyone shares their favorite recipes, discovers new ones, and makes lasting memories. Whether you’re new to hosting or a seasoned pro, this step-by-step approach will have you confidently planning a festive, fun-filled cookie swap that everyone will be talking about for years to come.

Ingredients You’ll Need
Hosting a successful cookie exchange party revolves around thoughtful preparation and opening your home with a welcoming spirit. While there are no traditional baking ingredients required for this guide, these essential elements will help you create an unforgettable event filled with warmth, flavor, and holiday joy.
- Invitations: Whether digital or paper, clear and festive invites set the tone and give guests all the necessary details.
- Tables and Display Space: Ample room to showcase cookies beautifully encourages guests to mingle and explore all the delicious options.
- Serving Essentials: Plates, napkins, and utensils keep the party neat and convenient for everyone.
- Festive Decorations: Lights, garlands, and music immerse your guests in the holiday spirit and create an inviting ambiance.
- Drink and Snack Options: Complement those sweet treats with drinks and savory nibbles that balance the experience.
- Packaging Materials: Boxes, bags, or tins make it easy for guests to take home their precious cookie treasures.
- Communication and Organization Tools: Recipe cards, sign-up sheets, or digital tracking systems prevent duplicate cookies and keep things running smoothly.
How to Make How to Host a Cookie Exchange Party (Cookie Swap Guide) Recipe
Step 1: Set a Date and Send Invites
Start by choosing a date that hits that sweet spot between early holiday excitement and busy schedules—ideally two to three weeks before the big day. Send out your invites at least two weeks in advance, giving guests enough time to plan and bake. Asking guests to share what type of cookie they’ll bring helps keep the flavors diverse and avoids repeats, which is key in a well-rounded swap.
Step 2: Decide on Cookie Rules
Clear guidelines make the event enjoyable and stress-free. Encourage each participant to bring one to two dozen homemade cookies, already portioned for sharing. Including a recipe or ingredient list with each batch adds a thoughtful touch that everyone appreciates, especially for those with food sensitivities. You can even suggest that guests pre-package individual cookies in small bags or boxes to simplify the swapping process.
Step 3: Prepare Your Space
Transform your hosting area into a cookie wonderland. Set up a large table to display the cookies in all their glory, making sure there’s plenty of room for extra platters, packaging supplies, and the swapping hustle. Spruce up the space with festive decorations like twinkling lights and greenery, and play some holiday tunes to set a joyful mood. Don’t forget essentials like serving utensils and napkins for quick and clean sampling.
Step 4: Provide Beverages and Light Snacks
No cookie exchange is complete without the perfect drinks and snacks to accompany the sweets. Offer a variety of warm beverages such as coffee, tea, and hot cocoa — perhaps even a holiday-themed punch to add some sparkle. Complement these with light savory finger foods like cheese boards or mini sandwiches to give your guests a delicious balance between sweet and savory.
Step 5: Organize the Swap
When guests arrive, invite them to introduce their cookies and share their recipes—it’s a fantastic way to connect and spark new baking inspirations. For the swap itself, choose a style that fits your group: a free-for-all where everyone fills their boxes as they like or a structured swap where participants take turns choosing. Both methods bring plenty of fun and friendly competition to your gathering.
Step 6: Include Extras
Take your cookie exchange to the next level by offering various packaging options, like decorative boxes or festive tins, for guests to conveniently carry home their goodies. A “Best Cookie” contest with small prizes can add excitement and encourage creativity. Consider printing recipe cards for each cookie or compiling them into a digital booklet to share after the party, keeping the festive spirit alive long after the last crumb is gone.
Step 7: Clean Up and Thank Your Guests
Plan ahead by placing trash bins in easy-to-reach places and keeping containers ready for leftover cookies to minimize any mess. Most importantly, express your gratitude to each guest for bringing their time, treats, and joy. Sending everyone home with a little party favor, like a festive cookie cutter or holiday candy, leaves them with a fond memory and something to inspire their next baking adventure.
How to Serve How to Host a Cookie Exchange Party (Cookie Swap Guide) Recipe
Garnishes
While cookies are the stars, little garnishes can elevate presentation and add a pop of festive flair. Think fresh rosemary sprigs, cinnamon sticks, or edible gold dust sprinkled lightly on platters. These simple touches make your cookie display feel like a holiday feast and invite guests to linger and savor each bite.
Side Dishes
Balancing sweets with savory elements is a winning strategy at any cookie exchange. Offer a thoughtfully curated cheese board, crunchy veggies with dip, or bite-sized sandwiches. These sides help cleanse palates and keep everyone energized for sampling the wide array of cookies on offer.
Creative Ways to Present
Presentation is part of the fun! Use tiered trays to showcase cookies at different heights, rustic wooden boards for a cozy vibe, or colorful platters to make cookies pop visually. Label each cookie with festive cards that include the cookie name and main ingredients. This not only looks charming but also helps guests make informed choices, especially those with dietary concerns.
Make Ahead and Storage
Storing Leftovers
Got cookies left over after the swap? Store them in airtight containers at room temperature or in the refrigerator depending on the cookie type. Keeping cookies fresh ensures they remain just as delightful as when first baked, perfect for nibbling in the days that follow.
Freezing
Many cookies freeze beautifully, which means you can save some of the magic for later. Wrap cookies tightly in plastic wrap, then place them in freezer bags or containers. When you’re ready for a treat, thaw at room temperature and enjoy as if freshly made.
Reheating
If you prefer warm cookies, a few seconds in the microwave or a brief bake at low temperature can bring them back to that freshly-baked grace. This little trick works wonders, especially for cookies with fillings or those that are best enjoyed warm.
FAQs
What if some guests have food allergies?
It’s important to encourage all guests to label cookies with common allergens such as nuts, gluten, or dairy. This transparency keeps everyone safe and comfortable. You can also suggest allergy-friendly cookie options to include a wider variety for all tastes.
How many guests is ideal for a cookie exchange party?
A group of 6 to 12 guests works wonderfully, ensuring a nice diversity of cookies without overwhelming space or choice. This size keeps the party intimate and manageable, allowing everyone to engage and enjoy.
Can the cookie exchange be done virtually?
Absolutely! For virtual swaps, guests can mail their cookies or share recipes ahead of time. Hosting a Zoom call to unveil and enjoy the cookies together adds a personal touch and keeps the community spirit strong despite distance.
Should I ask guests to bring homemade cookies only?
While homemade cookies are the heart of any cookie exchange, flexibility is important. Some guests might want to bring store-bought treats or family favorites. Discuss expectations ahead of time so everyone feels comfortable and no one is stressed about baking.
How do I handle duplicates in the cookie choices?
Encouraging guests to RSVP with their chosen cookie early on helps avoid duplicates. If duplicates happen, you can turn it into a fun bonus or encourage variety by having a sign-up list that everyone can reference.
Final Thoughts
Hosting a cookie exchange is one of those delightful traditions that brings warmth, connection, and of course, plenty of delicious cookies into your home. With this How to Host a Cookie Exchange Party (Cookie Swap Guide) Recipe, you’re not only preparing a fantastic festive event but also crafting memories that will be cherished for years to come. So gather your friends, dust off your cookie recipes, and dive into the joyous spirit of giving and sharing—your perfect holiday cookie swap awaits!
Print
How to Host a Cookie Exchange Party (Cookie Swap Guide) Recipe
- Prep Time: 1–2 hours
- Cook Time: 0 minutes
- Total Time: Varies by event
- Yield: 1 party – ideal for 6 to 12 guests
- Category: Holiday Guide
- Method: No-Cook
- Cuisine: American
Description
Learn how to host a fun and organized cookie exchange party with this comprehensive guide. From planning the date and sending invites to setting up your space, organizing the swap, and adding festive touches, this guide covers every step to ensure a memorable holiday cookie party for friends and family.
Ingredients
Ingredients
- Not applicable – this is a hosting guide rather than a food recipe
Instructions
- Set a Date and Send Invites: Choose a date about 2–3 weeks before the holidays when guests are festive but not overwhelmed. Send invitations at least two weeks in advance, requesting each guest to RSVP with the type of cookies they plan to bring to avoid duplicates.
- Decide on Cookie Rules: Establish clear guidelines such as having each guest bring 1–2 dozen homemade cookies, providing a printed recipe or ingredient list for each batch, and bringing cookies pre-portioned for easy swapping. Optionally, ask guests to pre-package cookies in small bags or boxes for convenience.
- Prepare Your Space: Arrange a large table for cookie display along with extra room for platters, bags, or boxes. Decorate using festive elements like lights, garlands, and holiday music. Ensure serving utensils and napkins are readily available.
- Provide Beverages and Light Snacks: Offer a variety of drinks such as coffee, tea, hot cocoa, or festive punch. Complement the sweets with light savory snacks like cheese boards, mini sandwiches, or finger foods to balance flavors.
- Organize the Swap: After guests arrive and cookies are displayed, invite them to introduce their cookies and share recipes. Facilitate the swap either via a free-for-all approach where guests fill their boxes or through a numbered rotation system for a structured exchange.
- Include Extras: Provide boxes, tins, or bags for guests to take home cookies. Consider hosting a “Best Cookie” contest with small prizes and distribute printed recipe cards or email a digital recipe booklet following the event.
- Clean Up and Thank Your Guests: Have containers prepared for leftover cookies and accessible trash bins. Show appreciation by thanking attendees and possibly offering party favors like cookie cutters or small holiday treats.
Notes
- Encourage creativity among guests while being mindful of allergens; ask guests to label cookies containing nuts, gluten, or other common allergens.
- For virtual cookie swaps, guests can mail cookies or recipes and participate in a Zoom call to share the experience.

