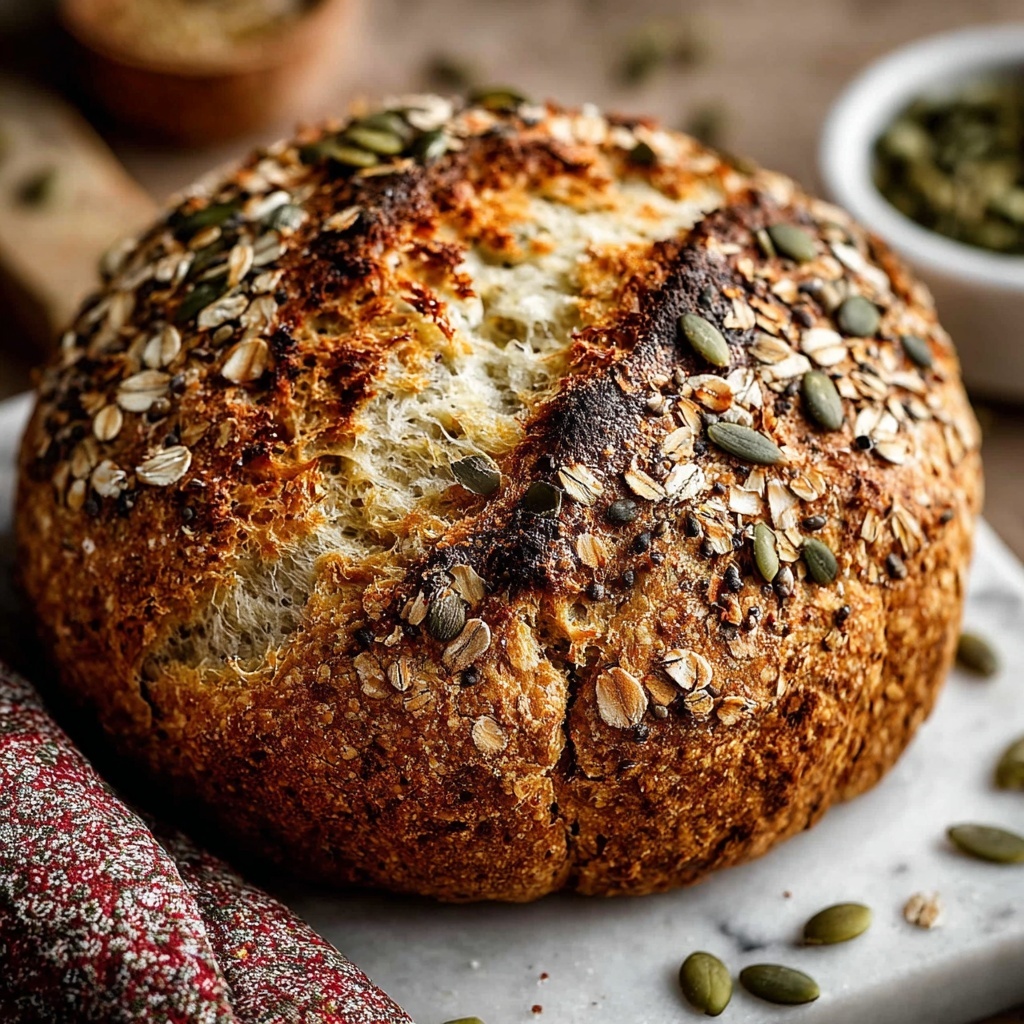
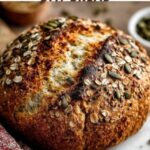
If you have been searching for a bread recipe that is not only incredibly easy but also packed with wholesome goodness, your search ends here. The No Knead Seeded Oat Bread Recipe is a game changer for anyone who loves hearty, rustic loaves but doesn’t want to spend hours working dough. This bread combines the nutty flavor of pumpkin and sunflower seeds, the hearty texture of whole oats, and the subtle sweetness of honey to create a loaf that is simply irresistible. It’s forgiving, requires minimal effort, and produces a loaf with a crunchy crust and soft, flavorful crumb that’s perfect for breakfast, sandwiches, or just a satisfying snack with butter.
Ingredients You’ll Need
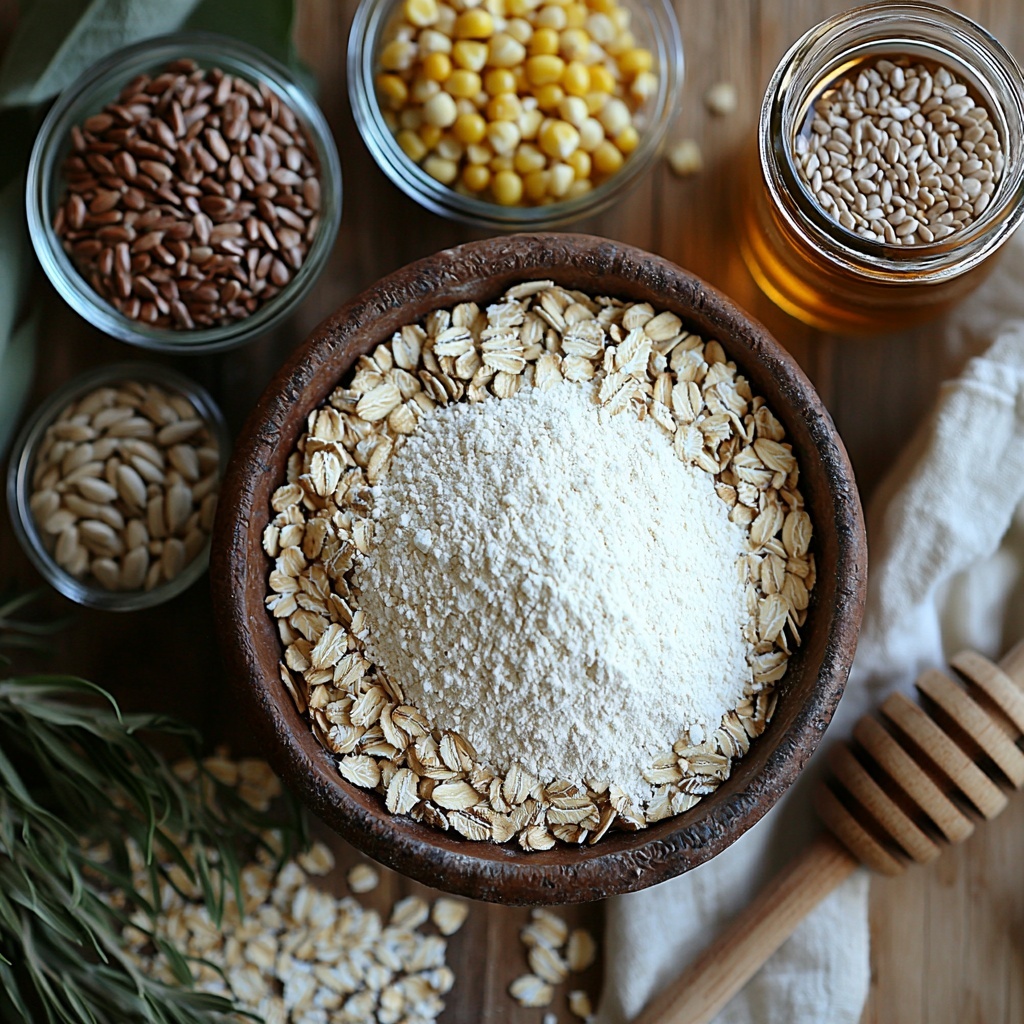
This recipe uses straightforward, pantry-friendly ingredients that all play an important role in the final loaf’s texture, taste, and appearance. Each element contributes to the delightfully nutty flavor and hearty structure that makes this bread so special.
- Bread flour: The foundation of the loaf, providing structure and chewiness for a perfect crumb.
- Platinum Yeast from Red Star instant yeast: This super reliable yeast ensures a dependable rise without fuss.
- Old-fashioned whole rolled oats: Adds a subtle nutty flavor and chewy texture inside the bread and on top for visual appeal.
- Pumpkin seeds (pepitas): These seeds add a lovely crunch and a boost of nutrition.
- Sunflower seeds: Complement the pumpkin seeds with their mild, buttery flavor.
- Flax seeds or sesame seeds: A touch of earthiness and extra texture that enhances every bite.
- Coarse salt: Essential for balancing flavors and helping develop the crust.
- Honey: Adds just the right hint of sweetness to brighten the flavor.
- Warm water: Activates the yeast and hydrates the dough properly for perfect fermentation.
- Cornmeal (optional): For dusting the pan, it prevents sticking and adds a subtle texture to the crust.
How to Make No Knead Seeded Oat Bread Recipe
Step 1: Prepare and Get Inspired
Before jumping into the dough, take a moment to watch a video demonstration of this recipe. Seeing the texture and technique firsthand is incredibly helpful for building your confidence with this no-knead method.
Step 2: Mix the Dry Ingredients
In a spacious, ungreased mixing bowl, whisk together the bread flour and instant yeast until evenly combined. Add in the oats, pumpkin seeds, sunflower seeds, flax seeds, and coarse salt, and whisk again to distribute all the components thoroughly. This dry mix forms the backbone of the dough, infusing it with seeds and texture that will shine later.
Step 3: Incorporate the Wet Ingredients
In a separate container, mix the honey with the warm water to dissolve the honey. Pour this mixture over the dry ingredients, then stir gently with a silicone spatula or wooden spoon. Don’t worry if the dough looks shaggy and dry at first — keep working it carefully until all the flour is moistened. The dough will be very sticky, which is perfect for a no-knead loaf.
Step 4: First Rise at Room Temperature
Cover the bowl tightly with plastic wrap or aluminum foil and let the dough rise on your kitchen counter for about three hours. During this time, the dough should nearly double in size and develop plenty of beautiful air bubbles, signaling a good fermentation.
Step 5: Optional Extended Cold Fermentation
For an even deeper flavor and better texture, place the covered dough in the refrigerator for 12 to 72 hours. This slow rise allows the yeast to work gently, creating complex flavors and an excellent crumb. If you don’t have the time, even a couple of hours in the fridge will improve the loaf.
Step 6: Shape the Dough
Lightly dust a nonstick baking sheet with flour or cornmeal. Using floured hands, gently shape the sticky dough into a round ball without deflating it too much. You can do this right in the bowl or on a lightly floured surface. Transfer the dough onto the baking sheet.
Step 7: Add the Seed Topping and Rest
Mix the tablespoon each of oats, pumpkin seeds, sunflower seeds, and teaspoon of flax or sesame seeds for the topping. Sprinkle this evenly over the dough, pressing gently so the seeds stick. Loosely cover and let the dough rest for 45 minutes while your oven preheats.
Step 8: Preheat the Oven
Set your oven to 425°F (218°C). Preheating is important to get that great oven spring and crust formation you’re aiming for.
Step 9: Score the Loaf
Using a sharp knife, bread lame, or kitchen scissors, make a slash or an X about half an inch deep on the surface of the dough. This scoring allows the bread to expand gracefully in the oven without cracking randomly.
Step 10: Create Steam for a Crispy Crust (Optional)
Place a metal pan or cast iron skillet on the bottom oven rack. When you put the bread in, pour 3 to 4 cups of boiling water into this pan and quickly close the door. The steam will help develop a beautifully crisp crust on your loaf.
Step 11: Bake the Bread
Bake the bread for about 40 minutes or until the crust is a rich golden brown. If you notice it browning too quickly, tent it loosely with foil. To check for doneness, tap the bottom of the loaf — a hollow sound means it’s ready, or use an instant read thermometer aiming for 195°F (90°C) internally.
Step 12: Cool Before Slicing
Remove the bread from the oven and let it cool for 10 to 20 minutes on a wire rack before slicing. This resting lets the crumb set perfectly and keeps the bread moist inside.
How to Serve No Knead Seeded Oat Bread Recipe
Garnishes
To elevate your loaf even more, consider spreading creamy butter or your favorite nut butter to complement the earthy flavors. A drizzle of honey or a sprinkle of flaky sea salt can also add a wonderful finishing touch.
Side Dishes
This bread pairs beautifully with soups, stews, or fresh salads. Its hearty structure holds up well when dipped into broths, and it’s perfect for soaking up every last bit of your favorite savory dish.
Creative Ways to Present
Try cutting the loaf into thick slices and toasting them lightly before arranging on a cheese or charcuterie board. Topped with soft cheeses, smoked meats, or pickled veggies, the No Knead Seeded Oat Bread Recipe loaf becomes a star ingredient at your next gathering.
Make Ahead and Storage
Storing Leftovers
Keep any leftover bread loosely covered at room temperature for up to three days to maintain its fresh crust and texture. Avoid sealing it tightly, as the crust may soften.
Freezing
You can freeze the bread whole or sliced, wrapped tightly in plastic wrap and then foil or stored in an airtight bag. This preserves freshness for up to three months. Just thaw at room temperature when needed.
Reheating
For a just-baked taste, refresh your loaf by warming it in a preheated oven at 350°F (175°C) for 10 to 15 minutes. If sliced, a quick toast brings back the crisp crust and warm crumb.
FAQs
Is this recipe really no knead?
Absolutely! The dough is sticky and loose, and it’s stirred rather than kneaded. The long rise time and careful shaping do all the work, making it super easy for any home baker.
Can I use all-purpose flour instead of bread flour?
While bread flour gives a better chew and structure, all-purpose flour will still work if that’s what you have. The crumb might be slightly softer but delicious nonetheless.
What if I don’t have pumpkin or sunflower seeds?
You can substitute with any combination of your favorite seeds like chia, hemp, or even chopped nuts to keep that delightful crunch and nutrition.
Why is the dough so sticky?
Sticky dough is a hallmark of no-knead breads—it helps create a moist interior and open crumb. Don’t be tempted to add lots of extra flour; just work with floured hands and surfaces.
Can I shape the dough earlier if I’m short on time?
Yes, you can bake after the initial three-hour rise if pressed for time, but refrigerating longer enhances flavor and makes shaping easier.
Final Thoughts
Now that you know how simple and rewarding the No Knead Seeded Oat Bread Recipe is, I can’t wait for you to try it yourself. This loaf is genuinely one of my favorite go-to breads because it manages to be rustic, flavorful, and effortless all at once. Trust me, once you taste the nutty seeds and the soft, wholesome crumb, it will become a staple in your kitchen as much as it is in mine!
Print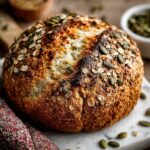
No Knead Seeded Oat Bread Recipe
- Prep Time: 4 hours
- Cook Time: 40 minutes
- Total Time: 4 hours 40 minutes plus optional 12-72 hours refrigeration
- Yield: 1 loaf; 10-12 servings
- Category: Bread
- Method: Baking
- Cuisine: American
- Diet: Vegetarian
Description
This No Knead Seeded Oat Bread is a wholesome, rustic loaf packed with hearty oats and a mix of pumpkin, sunflower, and flax seeds. It requires minimal hands-on time with no kneading, allowing the dough to rise slowly for enhanced flavor and texture. The bread boasts a golden, crusty exterior and a tender, airy crumb, perfect for sandwiches, toast, or enjoying with your favorite spreads.
Ingredients
Dry Ingredients
- 3 cups (390g) bread flour (spooned & leveled), plus more as needed for shaping and pan
- 2 teaspoons (about 6g) Platinum Yeast from Red Star instant yeast
- 1 cup (85g) old-fashioned whole rolled oats
- 1/4 cup (30g) unsalted pumpkin seeds (pepitas)
- 1/4 cup (30g) salted or unsalted sunflower seeds
- 2 Tablespoons (18g) flax seeds or sesame seeds
- 2 teaspoons coarse salt
Wet Ingredients
- 2 Tablespoons (43g) honey
- 1 and 1/2 cups (360ml) warm water (about 95°F / 35°C)
Topping Ingredients
- 1 Tablespoon (5g) old-fashioned whole rolled oats
- 1 Tablespoon (8g) pumpkin seeds (pepitas)
- 1 Tablespoon (8g) sunflower seeds
- 1 teaspoon flax seeds or sesame seeds
Optional
- Cornmeal for dusting pan
Instructions
- Watch the Video: Begin by viewing the accompanying video to visualize the recipe steps and ensure you understand the process.
- Mix Dry Ingredients: In a large un-greased mixing bowl, whisk together the bread flour and instant yeast. Add the oats, pumpkin seeds, sunflower seeds, flax seeds, and coarse salt, and whisk to combine evenly.
- Add Honey and Water: Combine the honey and warm water in a separate container. Pour this mixture over the dry ingredients. Using a silicone spatula or wooden spoon, gently mix until all the flour is moistened. The dough will look dry and shaggy at first. If needed, use your hands to bring it together into a very sticky dough ball in the bowl. Avoid using a mixer as the dough is too sticky.
- First Rise: Cover the bowl tightly with plastic wrap or foil and let the dough rise at room temperature for 3 hours. It should nearly double in size and develop visible air bubbles.
- Optional Cold Ferment: For best flavor and texture, refrigerate the covered dough for at least 12 hours and up to 3 days. The dough may puff up further but might deflate slightly after 2 days, which is normal.
- Prepare Baking Surface: Lightly dust a large nonstick baking sheet with flour and/or cornmeal. With generously floured hands, gently shape the risen dough into a ball without deflating it too much. You can do this directly in the bowl or on a floured surface. Transfer the dough ball to the prepared baking sheet.
- Add Toppings and Rest: Mix together the topping oats and seeds in a small bowl. Sprinkle them evenly on top of the dough and press gently so they adhere. Cover loosely and let the dough rest for 45 minutes.
- Preheat Oven: While the dough is resting, preheat your oven to 425°F (218°C).
- Score the Dough: Using a sharp knife, bread lame, or kitchen shears, score the dough with a slash or an X about 1/2 inch deep to help it expand during baking. If the dough flattened during resting, reshape it gently before scoring.
- Prepare Steam (Optional): Place a shallow metal or cast iron pan on the bottom rack of the oven. Once you place the bread inside, pour 3–4 cups of boiling water into the pan quickly and close the oven door to create steam, which yields a crisper crust.
- Bake the Bread: Place the baking sheet with dough on the center rack and bake for 40 minutes or until the crust is golden brown. If browning too fast, tent the bread with foil. You can test doneness by tapping the loaf for a hollow sound or checking if the internal temperature reaches 195°F (90°C).
- Cool Before Slicing: Remove the bread from the oven and cool it on a wire rack for at least 10–20 minutes before slicing to let the crumb set properly.
- Storage: Store leftovers loosely covered at room temperature for up to 3 days or refrigerate for up to 10 days.
Notes
- Using platinum instant yeast ensures a reliable rise; regular instant yeast may also be used with similar results.
- Allowing a long cold ferment in the refrigerator deepens the bread’s flavor and improves texture but is optional.
- The steam method during baking creates a crispier crust but can be skipped if preferred.
- Flour and cornmeal dusting prevent sticking and add rustic texture to the crust.
- Do not attempt to knead this dough—it is designed to be mixed with gentle handling and left to rise slowly.
- The bread is very sticky; generously flour your hands when shaping to avoid sticking.
- Use a sharp knife or bread lame for scoring to achieve clean cuts that help with oven spring.
- Tent with foil if the crust is browning too quickly during baking to avoid burning.
- For a different flavor profile, you can substitute some seeds or use sesame instead of flax seeds.


