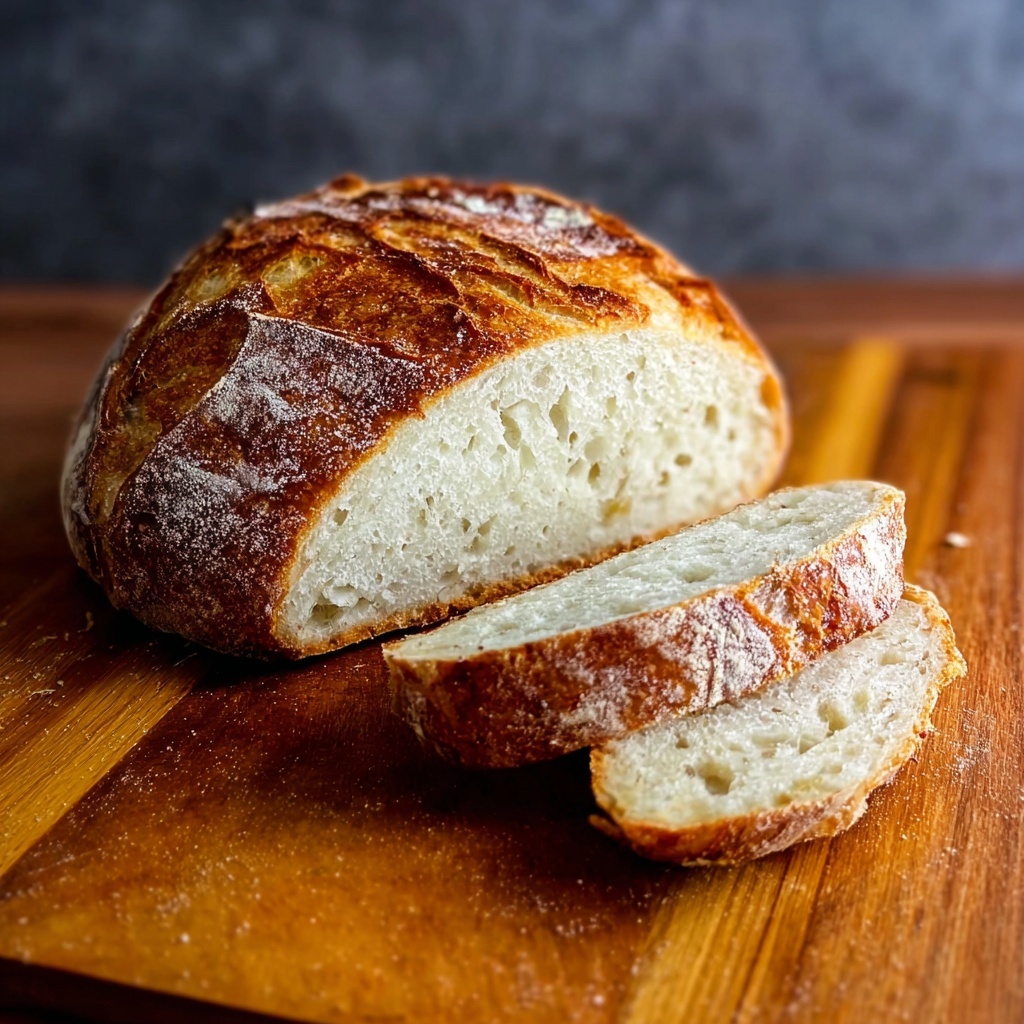
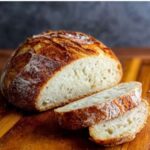
If you’ve ever wanted to bake bread at home but felt overwhelmed by the process, this Easy No Knead Bread Recipe is here to change your baking game forever. Imagine pulling a warm, crusty, and fragrant loaf fresh out of your oven with minimal effort and just a handful of basic ingredients. This recipe turns the usually daunting task of bread-making into a simple, relaxing ritual that even beginners can master. The charm of this Easy No Knead Bread Recipe is in its simplicity and the incredible, rustic loaf it produces — perfect for everything from sandwiches to a cozy dinner accompaniment.
Ingredients You’ll Need
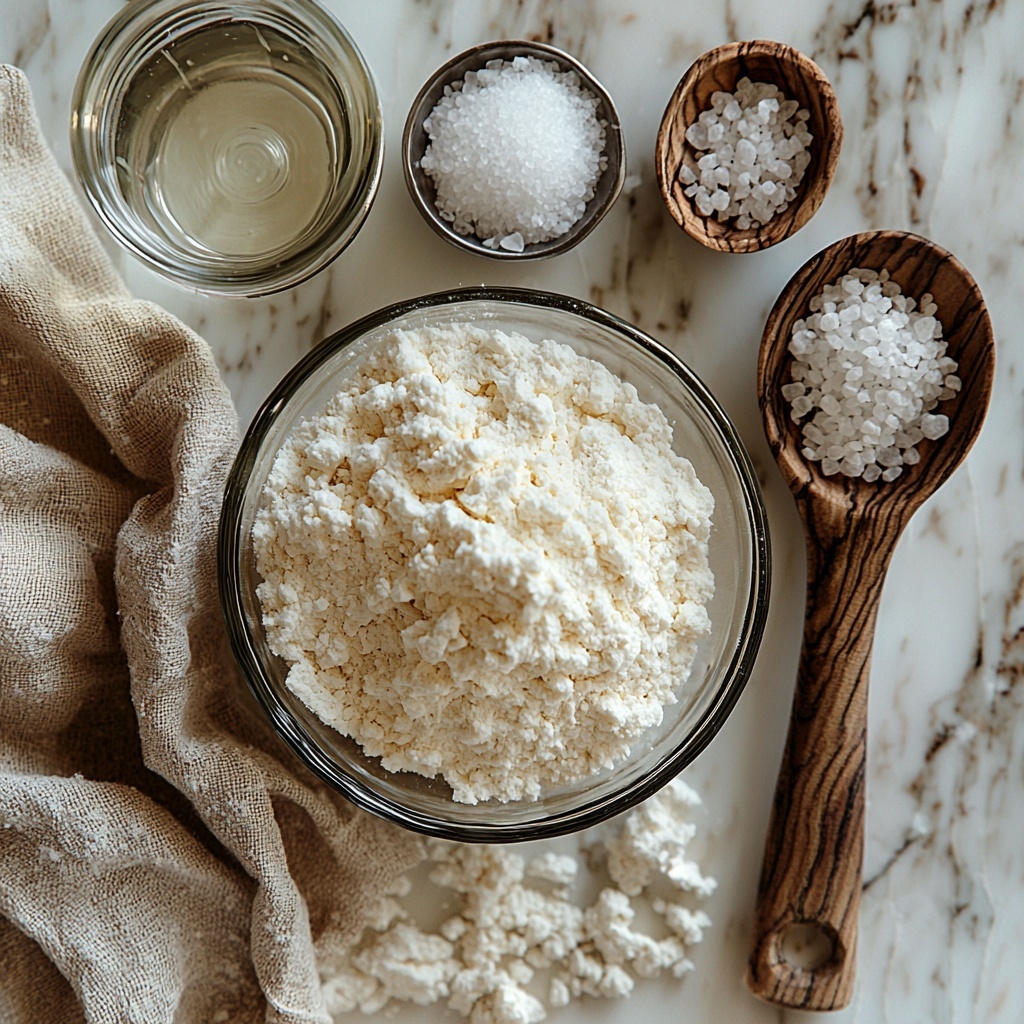
The beauty of this Easy No Knead Bread Recipe lies in its straightforward ingredients, each chosen for their essential role in creating that classic, airy crumb and golden crust. With just flour, yeast, salt, and water, you’re set for a fantastic home-baked loaf that feels both timeless and homemade.
- 3 cups All-purpose Flour: This is the foundation of your bread, providing structure and a soft crumb.
- 2 teaspoons Salt: Enhances flavor and controls yeast activity for the perfect rise.
- 2 teaspoons Active dry yeast: The magic agent that ferments the dough and creates those delightful air pockets.
- 1.5 cups warm water (between 100-110 degrees F): Activates the yeast and brings the dough together in a smooth, workable consistency.
How to Make Easy No Knead Bread Recipe
Step 1: Combine the Dry Ingredients
Start by mixing the flour, salt, and active dry yeast in a large bowl. This mix ensures that the salt and yeast distribute evenly throughout the dough, which is key for a consistent rise and flavor.
Step 2: Add Warm Water and Mix
Pour the warm water into the dry mixture and stir until the flour is fully incorporated. Don’t overthink the mixing—just make sure there are no dry bits left. Using your hands works great here to gently bring everything together.
Step 3: Let the Dough Rise
Cover your bowl with plastic wrap or a clean towel and leave it in a cozy spot to rise for about 2 hours. During this time, the dough will bubble and expand, slowly developing incredible flavor without you needing to knead it.
Step 4: Preheat the Dutch Oven
About 30 minutes before your dough’s rise is complete, place the lid on your Dutch oven and set it inside your oven preheating to 450 degrees F. This step is crucial for achieving that signature crust.
Step 5: Shape the Dough
Once the dough is ready, flour your countertop lightly, then scoop the dough out onto the surface. Gently shape it into a round loaf, being careful to handle it delicately so you don’t deflate the air bubbles.
Step 6: Score and Prepare for Baking
Use a sharp knife to score the top of your dough. This not only looks beautiful but allows steam to escape, helping the bread expand perfectly in the oven. Place the dough on a piece of parchment paper to make transferring simpler.
Step 7: Bake Covered
Carefully take your preheated Dutch oven from the oven, lift the dough on its parchment paper, and place it inside. Cover and bake for 30 minutes. The covered bake traps steam, giving you a crispy crust and moist interior.
Step 8: Bake Uncovered
Remove the lid and continue to bake for another 15 minutes. This final step lets the crust develop its irresistible golden color and satisfyingly crunchy texture.
Step 9: Cool Before Slicing
After baking, carefully remove the bread from the Dutch oven and let it cool completely on your countertop. Waiting ensures the crumb sets perfectly and prevents it from becoming gummy when sliced.
How to Serve Easy No Knead Bread Recipe
Garnishes
While the bread shines on its own, adding a spread of fresh herb butter, a drizzle of olive oil, or a sprinkle of coarse sea salt can enhance its flavor and add a little extra flair. Toast some garlic for a savory touch or dust with a pinch of grated Parmesan cheese for a subtle flavor boost.
Side Dishes
This bread pairs beautifully with soups, stews, or salads. Its crusty exterior and tender crumb make it the perfect tool for soaking up hearty broths or complementing fresh, bright greens. Think classic tomato basil soup or a robust beef stew for a comforting meal.
Creative Ways to Present
Elevate your table by slicing the bread into thick, rustic wedges and serving it in a woven basket lined with a colorful cloth napkin. Or transform it into individual bruschetta — toast thick slices and top them with diced tomatoes, basil, and a touch of balsamic glaze for an effortless appetizer that wows.
Make Ahead and Storage
Storing Leftovers
To keep your bread fresh, wrap it tightly in plastic wrap or place it in an airtight container at room temperature. It’s best enjoyed within two days for optimal texture and flavor, but it will stay good up to three days if stored properly.
Freezing
If you want to enjoy your Easy No Knead Bread Recipe later, slice it before freezing and wrap the slices individually or in small batches. This way, you can pull out just the amount you need without thawing the whole loaf.
Reheating
To revive a day-old loaf, sprinkle a little water on the crust and warm it in a 350-degree oven for 10 minutes. This will bring back that freshly baked crispness and make every bite taste like it just came from the oven.
FAQs
Do I really not need to knead the dough?
Yes! The magic of this Easy No Knead Bread Recipe is that the long rise replaces kneading, allowing gluten to develop gently. Your dough will still turn out elastic and airy without the extra work.
Can I use whole wheat flour instead of all-purpose?
Whole wheat flour can be used, but it will alter the texture and flavor, making it denser and heartier. You might want to substitute only half the flour with whole wheat for a balanced loaf.
Is it necessary to bake the bread in a Dutch oven?
While the Dutch oven is ideal for creating steam and a crusty exterior, you can bake the loaf on a baking stone or sheet and spritz the oven with water for steam. However, results may vary slightly.
What if I don’t have active dry yeast?
Instant yeast can be used as a substitute with similar results, but reduce the amount by about 25%. Avoid using old or expired yeast for the best rise.
Can I add flavors like herbs or garlic to this bread?
Absolutely! Mix in fresh herbs, minced garlic, or even some shredded cheese during the initial mixing step for a delicious twist that’s all your own.
Final Thoughts
There’s something truly special about baking your own bread, especially when it’s as effortless and rewarding as this Easy No Knead Bread Recipe. From the simple ingredients to the hands-off rising and that glorious crust, this bread invites you to slow down and savor the process. Go ahead, give it a try—you might just find your new favorite baking project that’ll soon become a staple in your kitchen and your heart.
Print
Easy No Knead Bread Recipe
- Prep Time: 10 minutes
- Cook Time: 45 minutes
- Total Time: 2 hours 55 minutes
- Yield: 12 servings
- Category: Bread
- Method: Baking
- Cuisine: American
Description
This Easy No Knead Bread recipe is a simple, foolproof method to bake a delicious and crusty homemade loaf without the need for kneading. Using just a few basic ingredients and a Dutch oven, it produces a soft, airy interior with a perfectly crispy crust, making it ideal for novice bakers and bread lovers alike.
Ingredients
Dry Ingredients
- 3 cups All-purpose Flour
- 2 teaspoons Salt
- 2 teaspoons Active dry yeast
Wet Ingredients
- 1.5 cups Warm water (between 100–110 degrees F)
Instructions
- Combine Dry Ingredients: In a large bowl, mix together the all-purpose flour, salt, and active dry yeast thoroughly to ensure even distribution of the yeast and salt.
- Add Warm Water and Mix: Heat the water to between 100-110 degrees Fahrenheit, then pour it into the flour mixture. Stir together until all the flour is incorporated. You may use your hands to gently bring the dough together, stopping as soon as there is no dry flour left.
- Let Dough Rise: Cover the bowl with plastic wrap or a clean towel and place it in a warm spot for approximately 2 hours to allow the dough to rise and develop flavor.
- Preheat Dutch Oven: Thirty minutes before the dough finishes rising, place the lid on your Dutch oven and set it in the oven. Preheat the oven to 450 degrees Fahrenheit to ensure the Dutch oven is hot and ready for baking.
- Shape the Dough: Once the dough has doubled in size and finished rising, lightly flour a flat surface and scoop the dough out of the bowl onto it.
- Form Loaf and Score: Gently shape the dough into a round loaf, then lightly score the top with a sharp knife to allow for expansion during baking. Place the shaped dough on a large piece of parchment paper for easy transfer.
- Transfer to Dutch Oven and Bake: Carefully remove the hot Dutch oven from the oven, open the lid, and lift the dough with the parchment paper inside the pot. Cover the Dutch oven with its lid and return it to the oven to bake for 30 minutes.
- Uncover and Finish Baking: After 30 minutes, remove the lid of the Dutch oven and continue baking the bread for another 15 minutes to develop a golden, crispy crust.
- Cool the Bread: Take the bread out of the Dutch oven carefully and set it on the counter to cool completely before slicing to preserve the crumb structure and flavor.
Notes
- Ensure the water temperature is between 100-110°F to activate the yeast without killing it.
- Using a Dutch oven helps create steam and a crusty texture, but if unavailable, a heavy oven-safe pot with a lid may be used.
- Do not skip the cooling step; slicing too soon can result in a gummy crumb.
- If you prefer a tangier flavor, you can extend the rise time overnight in the refrigerator.
- Lightly flouring your hands and the work surface prevents sticking without drying out the dough.


